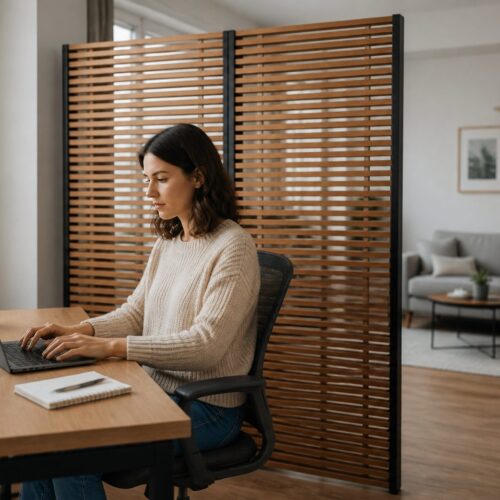
In the realm of home office design, maximizing space is often a top priority, especially in smaller homes or apartments. A traditional desk can take up valuable floor area, making a room feel cramped and cluttered.
However, there’s an innovative solution gaining popularity: the floating desk. A floating desk, also known as a wall desk or floating shelf desk, offers a sleek and space-saving alternative that can transform your small office into a functional and stylish workspace.
This article will guide you through the process of installing a floating desk in your small office, covering everything from assessing your space and choosing the right desk to the actual installation and safety considerations. Get ready to discover how a floating desk can revolutionize your small space and enhance your productivity.
The Advantages of a Floating Desk for Small Spaces
A floating desk offers several key advantages, particularly when dealing with limited square footage. Its primary benefit is its space-saving design, as it mounts directly to the wall, freeing up floor space that would otherwise be occupied by a traditional desk’s legs or frame.
This can make a significant difference in a small office, making the room feel more open and airy. The minimalist aesthetic of a wall desk also contributes to a cleaner, less cluttered look, which can be especially beneficial in a small space where visual clutter can easily overwhelm.
Beyond space-saving, a floating desk offers flexibility in terms of height adjustment. Unlike standard desks with fixed heights, you can mount a wall desk at the perfect ergonomic height for your needs, promoting better posture and reducing strain during long work sessions.
This is particularly useful if you share the workspace with others or if you have specific ergonomic requirements. A floating shelf desk can also be a stylish addition to your home office decor.
Another significant advantage is the customization it allows. You can choose the exact size, shape, and material to perfectly match your existing decor and personal preferences.
Floating desks can be crafted from various materials like wood, metal, or even glass, offering a wide range of aesthetic options. This makes it easy to integrate a floating desk seamlessly into any small office design.
Furthermore, cleaning around a floating desk is much easier compared to a traditional desk. With no legs to navigate around, you can quickly sweep or vacuum the floor underneath, maintaining a tidy and hygienic workspace.
This ease of cleaning is a definite plus for busy individuals who want to minimize cleaning time. Finally, floating desks can often be more affordable than traditional desks, especially if you opt for a DIY approach.
You can purchase a simple shelf and mounting brackets and create a functional and stylish floating desk for a fraction of the cost of a store-bought desk. This makes it an attractive option for those on a budget who still want to maximize their small office space.
Assessing Your Wall and Space Requirements
Before you rush out and purchase a floating desk, it’s important to carefully assess your wall and space requirements. Start by identifying a suitable wall in your small office where you plan to install the desk.
Consider factors such as the wall’s location relative to power outlets, natural light sources, and other furniture in the room. You’ll want to choose a spot that is both functional and aesthetically pleasing.
Next, examine the wall itself to determine its construction. Is it a drywall, plaster, or concrete wall? This will affect the type of mounting hardware you’ll need and the installation techniques you’ll use.
Drywall, for instance, requires different anchors than concrete. Also, check for any obstructions behind the wall, such as pipes or electrical wiring, before drilling any holes.
Beyond the wall’s material, consider its weight-bearing capacity. A floating desk will need to support the weight of your computer, books, and other work essentials.
If you plan to place heavy items on the desk, ensure the wall is strong enough to handle the load, and consider using additional support brackets. Measure the available space on the wall to determine the maximum size of the floating desk you can install.
Take into account the width and depth of the desk, as well as the height at which you plan to mount it. Ensure that the desk won’t obstruct doorways, windows, or other furniture in the room.
Also, consider the placement of electrical outlets and data ports. You’ll want to position the desk in a location where you can easily access power and internet connections without running unsightly cords across the room.
Finally, think about the overall layout of your small office and how the floating desk will fit into the existing design. Consider the flow of traffic in the room and ensure that the desk doesn’t create a bottleneck or impede movement. By carefully assessing your wall and space requirements, you can choose the perfect location and size for your floating desk, maximizing its functionality and aesthetics.
Choosing the Right Type of Floating Desk
Floating desks come in a variety of styles, sizes, and materials, so it’s important to choose one that suits your needs and complements your office decor. Consider the size of your workspace and the amount of surface area you require for your work activities.
If you only need a small surface for a laptop and a few essentials, a compact floating shelf desk may suffice. If you require more space for multiple monitors, documents, or other equipment, opt for a larger wall desk.
| Desk Type | Typical Size | Ideal For |
|---|---|---|
| Compact Floating Shelf Desk | 24-36 inches wide | Laptops, minimal supplies, small spaces |
| Standard Floating Desk | 48-60 inches wide | Multiple monitors, more workspace |
| Corner Floating Desk | Variable, fits into corners | Maximizing corner space, unique layouts |
| Standing Floating Desk | Adjustable height | Ergonomic setups, standing while working |
In addition to size, consider the material of the floating desk. Wood is a popular choice for its warmth and natural beauty, while metal offers a more modern and industrial look.
Glass floating desks can create a sleek and minimalist aesthetic, but they may require more frequent cleaning. Think about the overall style of your small office and choose a material that complements the existing decor.
Another factor to consider is the type of mounting system used by the floating desk. Some desks use simple brackets that attach directly to the wall, while others have more elaborate systems with hidden supports.
Choose a mounting system that is appropriate for the type of wall you have and the weight you plan to place on the desk. Also, consider whether you want a floating desk with built-in storage options, such as drawers or shelves.
These can be useful for keeping your workspace organized and clutter-free, but they may also add to the overall cost and complexity of the installation. Finally, think about the shape of the floating desk.
Rectangular desks are the most common, but you can also find corner desks, L-shaped desks, and even curved desks. Choose a shape that fits your space and work style.
Tools and Materials Needed for Installation
Before you begin the installation process, gather all the necessary tools and materials. This will ensure a smooth and efficient installation, minimizing the risk of errors or delays.
Here’s a comprehensive list of what you’ll need: a stud finder, level, drill with various drill bits, screwdriver (or drill with screwdriver bits), measuring tape, pencil, appropriate mounting hardware (screws, anchors), safety glasses, and of course, your floating desk kit.
Make sure the mounting hardware is suitable for the type of wall you have (drywall, plaster, or concrete). If you’re unsure, consult with a hardware store professional to ensure you have the correct anchors and screws.
Also, have a first-aid kit nearby in case of minor injuries during the installation process. With all your tools and materials ready, you’ll be well-prepared to tackle the installation of your floating desk.
A high-quality stud finder is crucial for locating the wooden studs behind your drywall. These studs are essential for providing a secure anchor point for your floating desk, especially if you plan on placing heavy items on it.
A level is also indispensable for ensuring that your floating desk is perfectly horizontal. An unlevel desk can be uncomfortable to work at and can also cause items to slide off.
A drill with a variety of drill bits is necessary for creating pilot holes and driving screws. Make sure you have the correct size drill bit for the screws you’ll be using.
A measuring tape and pencil are essential for accurately marking the location of the mounting brackets. Precise measurements are crucial for ensuring that the desk is properly aligned and level.
Safety glasses are a must-have for protecting your eyes from dust and debris during the drilling process. It’s always better to be safe than sorry when working with power tools.
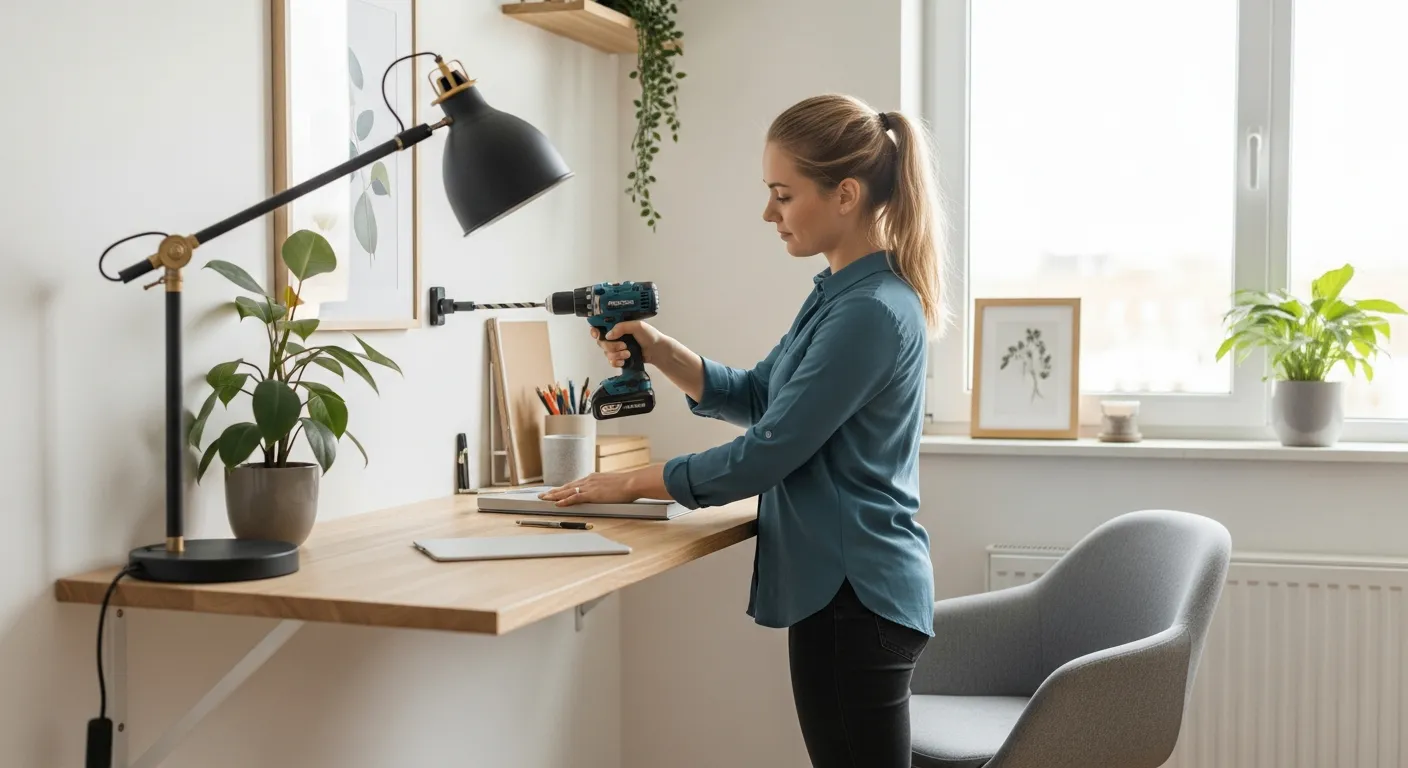
Step-by-Step Guide to Installing a Floating Desk
Now comes the exciting part: installing your floating desk. Follow these step-by-step instructions for a successful installation: First, use a stud finder to locate the wall studs behind your desired mounting location.
Mark the stud locations with a pencil. If your floating desk requires mounting to studs, align the mounting brackets with the marked stud locations.
- Mark stud locations precisely
- Pre-drill pilot holes
- Attach mounting brackets
- Level the desk surface
- Conceal hardware
After marking the stud locations, pre-drill pilot holes into the wall studs using a drill bit slightly smaller than the diameter of your screws. This will make it easier to drive the screws and prevent the wood from splitting.
Next, attach the mounting brackets to the wall studs using screws. Make sure the brackets are securely fastened and aligned properly.
Once the mounting brackets are in place, carefully lift the floating desk and position it onto the brackets. Ensure that the desk is level before securing it to the brackets.
Use a level to check the desk’s horizontal alignment and make any necessary adjustments. Once the desk is level, secure it to the brackets using screws or other fasteners, depending on the type of mounting system.
Finally, conceal the mounting hardware with decorative covers or caps, if provided. This will give your floating desk a clean and professional look.
Double-check that all screws are tightened and that the desk is securely mounted to the wall. Test the stability of the desk by applying gentle pressure to different areas. If the desk feels wobbly or unstable, re-tighten the screws or add additional support.
Safety Considerations and Weight Limits
Safety should always be a top priority when installing a floating desk. Before you start using your new workspace, it’s important to understand the weight limits of your floating desk and the wall it’s mounted on.
Exceeding these limits can lead to serious accidents and damage to your wall or desk. Check the manufacturer’s specifications for the maximum weight capacity of your floating desk.
Keep in mind that this weight limit includes the weight of the desk itself, as well as anything you place on it, such as monitors, laptops, books, and other accessories. Distribute the weight evenly across the desk surface to avoid putting too much stress on any one area.
If you plan to place heavy items on your floating desk, consider reinforcing the wall with additional support or using heavier-duty mounting hardware. Regularly inspect the mounting brackets and hardware for any signs of wear or loosening, and tighten them as needed.
When installing the desk, always wear safety glasses to protect your eyes from dust and debris. Use a stud finder to locate wall studs and ensure that the mounting brackets are securely attached to the studs.
If you’re unsure about the weight-bearing capacity of your wall or the proper installation techniques, consult with a professional contractor or handyman. Avoid placing excessive weight on one area of the desk.
Distribute the load evenly across the surface to prevent stress on the mounting hardware. Be mindful of the placement of electrical cords and cables.
Use cable management solutions to keep cords organized and prevent tripping hazards. If you have children or pets, consider installing a safety lock or latch to prevent them from accidentally pulling the desk down.
Regularly inspect the desk for any signs of damage or wear. If you notice any cracks, loose screws, or other issues, address them immediately to prevent further damage or accidents. Following these safety precautions will help ensure that your floating desk is a safe and functional addition to your small office.
Customizing Your Floating Desk Setup
Once your floating desk is securely installed, it’s time to customize your setup to maximize its functionality and aesthetics. Start by organizing your desk space with cable management solutions to keep cords and wires tidy and out of sight.
Use cable ties, clips, or sleeves to bundle and conceal cables, creating a cleaner and more organized workspace. Consider adding storage solutions, such as floating shelves or wall-mounted organizers, to keep your desk clutter-free and your essentials within easy reach.
Personalize your floating desk with decorative items that reflect your style and personality. Add plants, artwork, or other accessories to create a visually appealing and inspiring workspace.
Consider adding a monitor arm to your floating desk setup for enhanced ergonomics and space-saving benefits. A monitor arm allows you to adjust the height, tilt, and swivel of your monitor, optimizing your viewing angle and reducing strain on your neck and eyes.
Install LED strip lights underneath the desk to create a soft and ambient glow. This can add a touch of style and also provide additional lighting for your workspace.
Add a comfortable and ergonomic chair to complete your floating desk setup. Choose a chair that provides adequate support for your back and promotes good posture.
Consider adding a keyboard tray to your floating desk for improved ergonomics. A keyboard tray allows you to position your keyboard at a comfortable height and angle, reducing strain on your wrists and arms.
Personalize your floating desk with a desk mat or blotter. This can protect the surface of your desk from scratches and spills, while also adding a touch of style and personality.
Hang a whiteboard or corkboard near your floating desk to keep track of important notes and reminders. This can help you stay organized and focused on your work.
Maintaining Your Floating Desk
To keep your floating desk in top condition and ensure its longevity, regular maintenance is essential. Dust your desk regularly with a soft cloth to prevent the buildup of dirt and grime.
Avoid using harsh chemicals or abrasive cleaners, as these can damage the finish of your desk. For spills or stains, clean them up immediately with a damp cloth and mild soap.
Periodically inspect the mounting hardware to ensure it’s still secure and tightened properly. If you notice any signs of loosening, tighten the screws or bolts as needed.
Avoid overloading your floating desk with excessive weight, as this can put undue stress on the mounting hardware and potentially cause the desk to fail. By following these simple maintenance tips, you can keep your floating desk looking its best and ensure it provides you with a functional and stylish workspace for years to come.
Protect the surface of your floating desk from scratches and dents by using a desk mat or coasters. This will help to keep your desk looking new for longer.
If your floating desk is made of wood, consider applying a wood polish or sealant to protect it from moisture and UV damage. This will help to prevent the wood from warping or fading over time.
Keep your floating desk free from clutter by regularly organizing your workspace. This will not only make your desk look more appealing, but it will also help you to stay focused and productive.
If you have any plants on your floating desk, be sure to water them regularly and provide them with adequate sunlight. Plants can add a touch of life and vibrancy to your workspace, but they require proper care.
Consider using a compressed air duster to clean hard-to-reach areas, such as the crevices around the mounting brackets. This will help to remove dust and debris that can accumulate over time.
Troubleshooting Common Installation Issues
Even with careful planning and preparation, you may encounter some common issues during the installation of your floating desk. One common problem is difficulty locating wall studs, especially in older homes with irregular stud spacing.
If your stud finder is unreliable, try using a strong magnet to locate drywall screws or nails, which are typically attached to studs. Another issue is drilling into unexpected obstructions behind the wall, such as pipes or electrical wiring.
To avoid this, use a stud finder with a built-in wire detector and exercise caution when drilling into walls. If you encounter resistance or hear unusual noises while drilling, stop immediately and investigate the cause.
If your floating desk isn’t level after installation, use shims to adjust the height of the mounting brackets until the desk surface is perfectly level. Don’t ignore these issues, address them carefully to ensure a safe and functional floating desk setup.
If the screws you’re using are stripping the wall studs, try using longer or thicker screws. You can also try using screw anchors to provide a more secure hold.
If the mounting brackets are not aligning properly with the wall studs, you may need to adjust their position slightly. Use a level to ensure that the brackets are aligned horizontally and vertically.
If the floating desk is wobbling or unstable, try tightening the screws on the mounting brackets. You can also try adding additional support brackets to provide more stability.
If the desk surface is uneven, you can use shims to level it out. Place the shims underneath the mounting brackets until the desk surface is perfectly level.
If you’re having trouble concealing the mounting hardware, try using decorative covers or caps. You can also try painting the hardware to match the color of the wall.
Conclusion
A floating desk is a fantastic solution for creating a functional and stylish home office in a small space. By following the steps outlined in this article, you can successfully install a floating desk that meets your needs and enhances your productivity.
Remember to assess your wall and space requirements, choose the right type of desk, gather the necessary tools and materials, and prioritize safety throughout the installation process. With a little planning and effort, you can transform your small office into a comfortable and efficient workspace with a floating desk.
The benefits of a floating desk extend beyond just saving space. They offer ergonomic advantages, customizable designs, and a modern aesthetic that can elevate the look and feel of your entire home office.
By embracing this innovative solution, you can create a workspace that is both functional and inspiring, allowing you to maximize your productivity and enjoy your work environment. So, take the plunge and transform your small office with a floating desk – you won’t regret it!