Define your goal: maximum desk space means more usable surface, fewer knocks from monitor arms, and cleaner cable runs. Start by measuring the edge clearance and the depth of your work zone so you can pick a mount that actually fits your setup.
Understand how design changes the choice. Classic lamp geometry—long arms and heavy shades—shifts the clamp-versus-base tradeoff. That style needs stronger support and may steer you toward a base for stability or a reinforced clamp for edge mounting.
What you’ll compare next: clamp mounts push hardware to the desk edge to free up surface area, while base mounts trade footprint for steady balance. You’ll also learn what to measure, which features matter for the U.S. market, and how lighting placement affects glare control around screens and your writing space.
– Measure edge clearance and workspace depth before buying.
– Match mount type to arm reach and shade weight.
– Prioritize stability for heavy designs and clamp strength for minimal footprint.
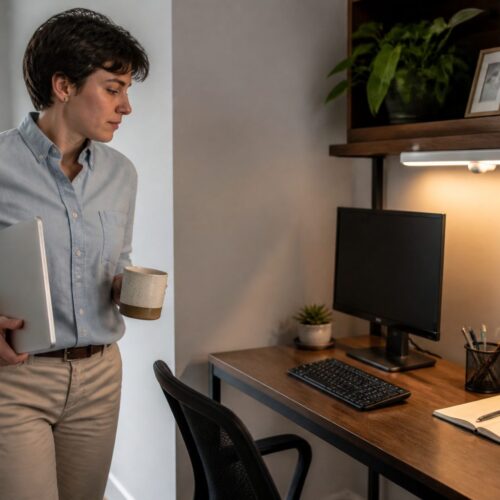
What you’re really optimizing when you “save desk space”
Saving desk space is more than shrinking a base — it’s about reclaiming the zones you actually use every day.

Start by separating your usable work zone from the lighting footprint. The usable zone holds your keyboard, mouse, notebook, tablet and other daily items. The footprint includes base diameter, clamp hardware, and the arm swing radius.
Your usable work zone vs your lighting footprint
List the items that get crowded: chargers, pen cups, docking stations, and small speakers. Note which items sit in your prime typing area and which can move to the edge.
- Measure base or clamp size vs the space you actually use.
- Map which items you touch most and keep them clear.
- Decide if you want open surface, stability, or flexibility.
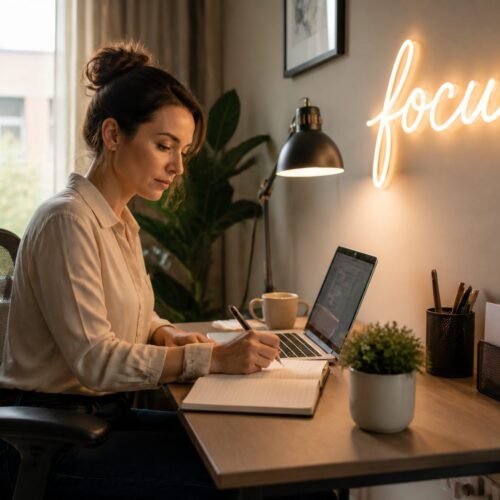
Productivity gains from clearer surfaces and better light placement
Moving the light to the perimeter or above your screen often reclaims more table surface than shrinking a fixture. Clear surfaces cut micro-adjustments and reduce knocks.
Better light placement also lowers eye strain. Aim to avoid hot reflections and heavy shadows by angling the light away from the screen and toward your writing area.
Classic lamp geometry and why it changes how mounts perform
When a long-armed, angular light reaches over your desk, its balance and reach change in ways you should plan for.
Center of gravity, reach, and shade shape: As the arm extends, the center of gravity moves forward. A wide, flat shade that is weight-forward increases leverage on the mount. That matters most when the arm is long; tipping risk and wobble rise faster than you expect.

How sharper profiles behave vs softer silhouettes
Sharper edges and flat planes throw more directional light and crisper shadows than rounded forms. That can be great for task focus but it also concentrates glare if the head crosses your screen or writing area.
Match proportions to your monitor and work area
Match shade width to monitor width and set lamp height near your eye line so the beam lights the pad without landing in your primary hand path.
- Check reach: extend the arm to its far position and note wobble.
- Compare shade width: should not overhang a monitor by more than 20%.
- Material note: brass adds useful mass but increases leverage if the top is heavy.
Rule of thumb: keep the light head at least 6–8 inches outside your dominant hand path while still covering your keyboard and writing pad. That keeps items accessible and glare minimal.
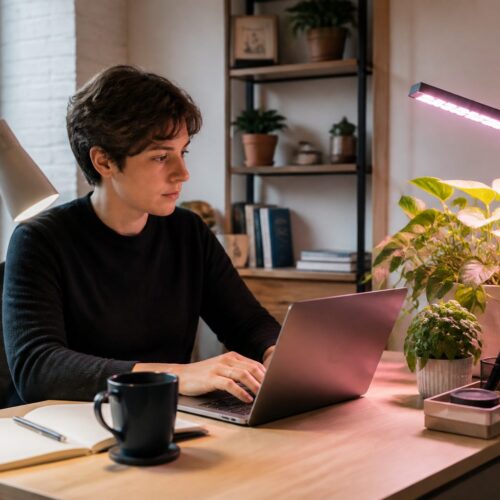
Clamp mounts at a glance for modern desks
Clamp mounts free your desktop by shifting support to the edge, so you keep the center clear for daily-use items. That makes them ideal when you need the surface for a keyboard, notebook, or small speakers.
Where clamp mounts save the most space
Clamps work best on narrow desks, floating tops, and setups where a monitor stand sits at center. They move the base off the table so you get usable surface back for essential items and task workflows.
Common clamp clearance issues you should measure first
Check rear lip thickness, support apron depth, and any under-desk cable trays before you buy. Measure whether the clamp can bite securely and clear the desk edge without hitting a skirt or bracket.
- Rear lip: can block clamp travel.
- Apron interference: reduces clamp range.
- Cable trays: may prevent tight clamping.
If your desk sits against a wall, plan arm arcs to avoid shade collisions and limited articulation. For a streamlined look, choose a matte black or other black finish clamp. Use pads or shims to protect soft or veneered tops and keep clamp pressure even.
Base mounts at a glance for stability and flexibility
If your setup needs steady support and easy repositioning, a heavy base often makes more sense than an edge clamp. A base frees you from desk-edge constraints and gives dependable balance for longer arms and fuller shades.
When a heavy base is the better tradeoff
Choose a base when your desk can’t accept a clamp, when you move the light between surfaces, or when a long reach would tip an edge mount. Heavier materials stop wobble and keep the head steady while you work.
How base shape affects “dead space” on your desktop
Different base shapes change where you can place daily items. Round bases leave a simple clearance circle. Oval and rectangular bases create longer footprints that block more surface area.
- Round: compact, best for small desks and central items.
- Oval: spreads weight front-to-back; better for offset placement.
- Rectangular: stabilizes tall arms but can create usable dead space under the arm.
Heavier materials can be a feature. If the arm reaches forward a lot, weight reduces rebalancing. Choose finishes to match your room: a brass or subtle gold base reads as a design accent, while a matte black base blends into a modern U.S. home office.
Safety note: base mounts reduce clamp slippage and edge leverage, so they are often a safer pick around kids, pets, and high-traffic desks.
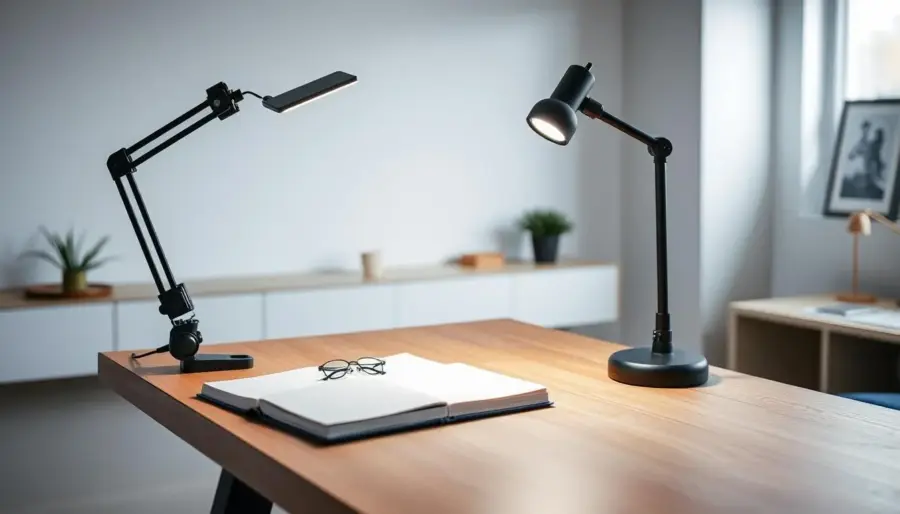
Clamp vs base mount comparison for your everyday setup
Your daily workflow and the items you keep in reach will tell you which mount fits best. Below is a focused comparison so you can match stability, reach, and protection to how you work.
Stability and tipping risk with long-arm fixtures
Clamp mounts resist tipping by anchoring to the desk edge. They move support out of your usable surface but need a solid bite to handle forward torque.
Base mounts rely on weight and footprint. A heavier base reduces wobble for long arms and for pieces with metal accents like brass or gold.
Adjustability and reach for task lighting
Consider swing radius, tilt, and height. Clamps often allow wider articulation without stealing desk area. Bases tend to be simpler to tilt and move when you reposition the light for a notebook or screen.
Surface protection and desk compatibility
- Clamps can mark soft tops—use shims or pads.
- Bases can scuff when dragged; add felt feet.
- Check apron depth and edge clearance before you buy.
Portability if you move the fixture between surfaces
Bases usually move faster between table, shelf, and desk. Clamps are more “set-and-forget” once installed.
Measurement checklist you should do before you buy
Before you buy, measure the exact spots where the mount will meet your desk and note any obstructions. A quick check prevents returns and keeps your workspace functional.
Desk thickness, rear clearance, and cable pass-throughs
Measure desktop thickness where a clamp will bite. Note the minimum and maximum range the clamp supports.
Check rear clearance and the distance to the wall. Look for cable pass-throughs or aprons that block clamp travel.
Ideal height and shade width for your screen and eye line
Estimate lamp height so the shade sits below your sightline but above your keyboard. Test while seated at your monitor to avoid direct glare.
Measure shade width against monitor width. Leave about 10–20% of the monitor edge free so the light doesn’t create screen reflections.
Outlet distance and cord routing plan
Map outlet location and plan cord runs so cords don’t cross your work area or snag on chair movement. Use under-desk clips or a power strip placed behind items.
- Step-by-step clamp check: desktop thickness, distance to wall, and rear pass-through clearance.
- Estimate eye-line height so the head won’t block view but still lights your keyboard and paper.
- Match shade width to monitor layout to reduce glare and keep reading areas well lit.
- Plan outlet distance and cord routing to avoid draping cords over the desk or items.
- Consider switching strategy—add a ceiling light or choose an LED solution for lower heat and better dimming when you work long hours.
- Do a quick fit test with painter’s tape to mark base footprint or clamp location before you buy.
Product roundup: geometric table lamps that pair well with base mounts
Read the base footprint before you read the shade. Heavy pieces with stone or metal bases almost always favor base mounting because their mass stabilizes long arms and wider heads.
How to read dimensions on a listing
Compare the two measurement sets conservatively. Treat the larger height (25.5″) and width (16″) as the working envelope, and use the bigger depth when planning side clearance.
Base dimensions (about 7.75″ x 4″ x 7.5″ in one set) show the actual footprint that can block usable desk surface. Plan so that the base won’t sit where your primary items live.
Materials that add stability and soften output
Travertine provides weight that limits wobble and keeps the piece steady under reach. Brass elements add structural strength and a warm accent; a touch of gold in finishes reads as a design highlight.
Fabric shades help diffuse light so you get softer task output and fewer screen reflections.
U.S.-ready socket and placement tips
The vintage Italian piece is rewired with an E26 medium base, so you can buy bulbs easily in the U.S. and choose wattage or LED color that suits your workday.
- Place the base outside your main keyboard area but within arm reach of a notebook or secondary items.
- Allow ~10–20% monitor edge clearance so the shade won’t cause glare.
- Use the larger listed measurements when in doubt—plan conservatively to protect your usable surface and items.
Product roundup: geometric table lamps that benefit from clamp-style placement
Place geometric pieces at the desk edge so they frame your workspace without stealing surface area. A clamp lets the form hover over your work zone while the desk edge takes the structural burden, making sculptural designs feel more architectural and less intrusive.
Nendo’s TGV INOUI cues: horizon lines and river stones
Nendo’s TGV INOUI-inspired piece uses horizontal bands and rounded forms—think horizon lines and river stones—to read calm and low. Clamping it at the rim keeps those wide cues out of your center, so the piece frames your monitor without crowding key items.
Lambert & Fils Ipoli: slender form for tight zones
The Ipoli’s slim aluminum profile is ideal when your desk holds a notebook and mouse. Use a clamp to free the center; the narrow body keeps the light’s footprint minimal while still reaching across your keyboard and paper.
Touch controls and progressive dimming for focus shifts
Touch dimming on models like the Ipoli makes brightness changes instant. You can move from email to deep reading without hunting for switches. When a brand also offers a pendant in the same family, clamp placement pairs well with overhead pendants to keep a consistent look while saving desk space.
- Best for you: keep daily items clear under the arm.
- Finish tip: pair a chrome led finish with modern accessories for a tech-forward feel.
- Mounting advantage: clamp placement turns wide pieces into precise task lights.
Portable and small-footprint picks for crowded desktops
For crowded desks, a truly compact fixture lets you keep mugs, chargers, and plants where you need them. A small-footprint choice minimizes base area, moves easily, and avoids conflict with everyday items.
Mater Terra and Matek composite: built for durability
Mater’s Terra is a portable light with a conical shade from Copenhagen’s OEO Studio. It launched in earthy red and slate black as a U.K. exclusive and comes in pendant and wall sconce options.
Matek composite mixes coffee bean shells with e-waste from retired tech. In plain terms, it reuses organic grit and recycled plastics to make a durable, water-repellent material that stands up to daily use.
Why water-repellent materials matter
Water resistance keeps a small, portable light safe near drinks and plants. Spills happen; a water-repellent finish reduces stains and swelling that can ruin lightweight materials.
- Define small-footprint: minimal base area, easy relocation, and no clash with daily items.
- Portability advantage: move the piece from desk to side table without tools or remounting.
- Buying tip: choose battery-powered portability for flexible spots, or a plug-in LED if you need steady brightness and dimming control.
When to skip desk mounts entirely and go with a pendant light
If your desk feels crowded despite a tidy layout, moving the fixture to the ceiling can reclaim the entire surface. A pendant light removes base dead space and avoids clamp conflicts with monitor arms and trays.
How a pendant moves light off the table and frees every inch
A pendant shifts the lighting footprint to the ceiling, so nothing sits on your desktop. That eliminates bases and clamps and keeps chargers, notebooks, and speakers unobstructed.
Best-fit pendant styles for productive workspaces
Choose a geometric pendant for crisp directional control if you want strong task contrast.
An led pendant gives efficient, cool-running output and often integrates dimming. A broader light pendant profile spreads even illumination and cuts harsh shadows.
Placement, glare, and height guidelines
- Hang about 28–34 inches above the desktop for seated work to avoid casting hand shadows.
- Offset the pendant slightly (4–8 inches) from your screen center to reduce monitor glare.
- Use adjustable rod or cord drops so you can raise the pendant for standing-desk use.
Commercial tradeoffs and safety checks
Installing a pendant takes more upfront effort and cost than a desk mount but delivers long-term gains in usable surface and cleaner cable runs.
- Confirm ceiling junction location and payload capacity.
- Plan cord or rod drop length to match monitor heights and standing adjustments.
- Verify the pendant won’t swing into high-traffic zones or block tall monitors.
Style and finish matching for a cohesive workspace look
Pick finishes that link your mount, shade, and desk accessories so your workspace reads as one design.
Matte black vs brushed nickel for modern U.S. home offices
Matte black hides cords and hardware so mounts visually recede. It works especially well against white walls and wood desks.
Brushed nickel reads lighter and pairs well with cooler woods and glass tops. Use brushed nickel where you want a softer metallic touch without heavy shine.
When chrome LED accents make sense
If your desk skews tech-forward, a chrome led detail can add crisp highlights. Pair chrome led accents with warmer bulbs so the finish doesn’t feel too cold.
Use chrome sparingly: a trim ring or switch keeps the look modern without dominating the palette.
Warm-metal coordination: brass, black brass, and black gold tones
Brass adds classic warmth; black brass gives a muted premium look. Black gold tones provide contrast without full gloss.
A single warm-metal accent keeps the space inviting while matte black or brushed nickel handle the heavy lifting.
- Visual tip: choose one dominant finish and echo it in two small items (monitor stand, clips, or a tray).
- Buy filters: set product pages to finish, material, and shade color to narrow fast.
- Practical: use a black finish on mounts to make sculptural pieces feel lighter on the desk.
Natural textures that soften classic lamp geometry
Natural textures can calm a sharp profile and make overhead fixtures feel more inviting. A woven shade changes contrast and the way you perceive a pendant light above your desk.
Rattan pendant light and rattan pendant options for warmer lighting vibes
Rattan pendant light gives softer diffusion than metal or glass. You’ll notice gentler shadows and warmer tones on paper and skin, which reduces visual fatigue during long tasks.
Choose a rattan pendant with a clean canopy or a subtle geometric profile to keep the look modern while preserving texture.
Where rattan works best in your room’s ceiling-to-desk line
Hang a rattan pendant about 28–34 inches above the desktop for seated work. Lower than that, and the weave may distract your sightline; higher, and you lose task benefit.
- Desk strategy: use a pendant to free surface area and pick rattan to warm an otherwise industrial setup.
- Pair a compact rattan pendant near a monitor or a wider rattan pendant light centered over a shared workspace.
- Maintenance tip: dust woven shades weekly and avoid placing them directly under humid plant sprays to keep the light looking fresh.
Room-scale lighting upgrades that reduce the need for desk lamps
A well-planned ceiling layer can simplify your desk setup and cut the number of fixtures you rely on. When ambient lighting covers general tasks, you only need one focused fixture for close work, which frees desk space and lowers clutter.
8-light chandelier considerations for shared workspaces
An 8-light chandelier spreads illumination across a long table or multiple desks. That even coverage reduces shadowing and often replaces two or three desk fixtures in a co-working or family workspace.
Choose dimmable bulbs and a compatible dimmer so you can shift from bright task light to softer ambient scenes without adding more desk pieces.
Candelabra and chandelier styles that complement geometric forms
Linear arms, globe clusters, and slim frames pair well with clean desk lines. A minimal chandelier reads modern without competing with monitors or shelving.
Candelabra-inspired chandeliers work best in rooms with higher ceilings or mixed traditional-modern decor. Use frosted or low-glare bulbs to avoid harsh reflections on screens.
Lantern pendant choices for transitional interiors
Lantern pendant options give a softer silhouette while keeping a defined structural presence. They echo angular pieces but feel warmer, making them a good fit for transitional homes.
From a commercial perspective, ceiling upgrades mean fewer desk lamps to buy, simpler inventory, and a unified lighting layer that makes workspaces easier to manage.
- Benefit: fewer desk fixtures and clearer surfaces.
- Design tip: match pendant or chandelier scale to table length and ceiling height.
- Practical: prefer dimming and low-glare bulbs for mixed-use rooms.
LED and controls: what to prioritize for productivity right now
The right LED features keep glare low and task clarity high as your day shifts. Focus on three core behaviors: steady dimming, low flicker, and fast response so you can change brightness without a lag or jump.
Dimming behavior you’ll actually use during your day
Progressive dimming feels smooth and predictable. You should notice a linear change in brightness rather than sudden steps.
Memory recall is useful: set a comfortable desk level for morning work and your preferred evening soft light. You’ll hit that setting more than you expect.
Task vs ambient output when your light is your primary light
Match lumen output to the job. For focused reading or detailed work you want higher task lumens concentrated over your pad or keyboard.
For room wash or video calls, lower output with a wider spread is better so screens don’t glare. A well-placed led pendant gives clearance and even spread, while a smaller desktop unit targets a narrow task zone.
- Stable dimming and flicker-free drivers prevent eye fatigue.
- Choose beam angle to avoid screen reflections and to light your work surface.
- Style note: subtle chrome led accents look modern, but keep finishes matte or offset trims so reflections don’t hit your eyes.
Simple daily plan: bright for focused morning work, medium for meetings, and low for evening winding down. You don’t need complex smart-home gear to follow it—just a dimmable fixture and a remembered routine.
Accessories and small items that protect your desk and maximize space
A few low-cost add-ons can prevent scratches, reduce cord clutter, and keep your light steady where you work.
Cable routing, cord clips, and under-desk power placement
Start with tidy cable runs to reclaim edge space. Use adhesive cord clips and an under-desk power strip so cords don’t drape across your work area.
Right-angle plugs and adhesive cable raceways reduce bulk at the back edge and stop cords from pulling a fixture into awkward positions.
- Adhesive cord clips for neat vertical runs
- Under-desk power strips to hide cords off the surface
- Right-angle plugs to save depth behind monitors and items
Felt pads, clamp shims, and surface guards for different table finishes
For base-mounted pieces, felt pads and furniture sliders let you reposition without scratching. Thicker pads add grip on slick surfaces and improve stability.
For clamps, use thin shims or rubber surface guards to spread pressure and avoid dents on soft wood. Check clamp tightness periodically to prevent creep.
- Felt pads or sliders for base movement and protection
- Clamp shims and rubber guards to distribute pressure
- Matte black clips or subtle hardware to match finishes like gold without distracting from the light
Buying confidence: these inexpensive items let you choose the fixture you love and solve fit or protection issues without compromising style or performance.
Conclusion
Let practical needs drive the choice: open surface, steady support, or a fully cleared desktop. Choose a clamp when you need maximum usable surface, pick a base when stability and mobility matter most, and opt for a pendant when you want the desk completely clear.
Remember that long reach and bold shapes increase forward leverage and footprint, so match mount strength to the form rather than shopping by looks alone. Measure desktop thickness, rear clearance, and shade sweep first to avoid returns.
Quick picks: tight desk → clamp; delicate surface → clamp with shims; frequent moves → base; shared space → pendant. Finish with a cohesive style path—matte black or warm-metal accents and a geometric pendant or light pendant if you want a statement.
Verify U.S. bulb base compatibility and choose dimming-capable LED drivers to support your daily workflow.