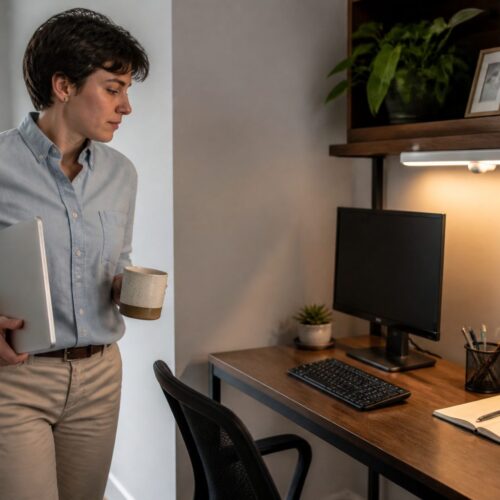
Your goal is simple: make a small office feel brighter without adding more fixtures. Start by planning how to steer light so work surfaces get more usable glow and corners lose their gloom.
Light rays leave a source, hit a surface, then change direction by reflection. By choosing the right mirror type and angle you can push daylight deeper into the room. A plane mirror does not project a real image; it creates a virtual image behind the mirror while helping redirect incident light into the space.
In this guide you’ll learn the basics of the law of reflection, how to spot dark zones, and when to use a convex option for wider coverage. Expect better overall illumination, but watch sightlines: careless placement can cause glare.
Best results come from pairing reflective surfaces with light paint, glass boards, and controlled finishes so the room feels brighter without harsh hotspots.
How light reflection actually boosts brightness in a small office
When a beam hits a polished surface, the outgoing path follows a simple rule. You can use that rule to send useful light into darker zones and lift the room’s overall glow.

The law of reflection and why angle matters
The law reflection says the angle of incidence equals the angle of reflection relative to the surface normal. Aim the incident ray from a window so the angle reflection directs light toward a target point, not back outside.
Specular vs diffuse reflection
Specular reflection from very smooth surfaces preserves a clear image and sends concentrated rays. Diffuse reflection from textured paint scatters ray light, which softens shadows and raises ambient brightness.
- Use specular surfaces to reach far points.
- Use diffuse finishes to lift whole zones evenly.
- Avoid direct glare by aiming bounces at walls or ceiling.
Glare basics
Glare appears when a reflected path aligns with your sightline. If that happens from a low sun angle, the result can be a harsh, full-blast hit to your eyes. Place surfaces so the reflected rays miss workstations and monitors.
Assess your office before you add reflective surfaces
Take a short tour of your workspace to map where light flows and where shadows persist.
Start by noting every source: windows, overhead fixtures, task lamps, plus glass doors that act as secondary entry points for natural light.

Map your light sources and light rays from windows and fixtures
Trace a few representative rays with tape on the floor or a quick sketch. Watch how an incident ray from a window hits an object then drops into a shadow.
Identify light-absorbing surfaces vs reflective surfaces
List finishes that absorb light: dark paint, heavy rugs, matte furniture. Mark surfaces that return light: light paint, glass, smooth desktops.
Find your highest-impact zones
Walk the perimeter to find dark corners, narrow corridors, the far side of L-shaped layouts, and the back wall opposite the window.
- Pick one or two target points to brighten first.
- Note blockers and the predictable distance of their shadows.
- Check where a mirror would be visible from normal work positions so it won’t distract.
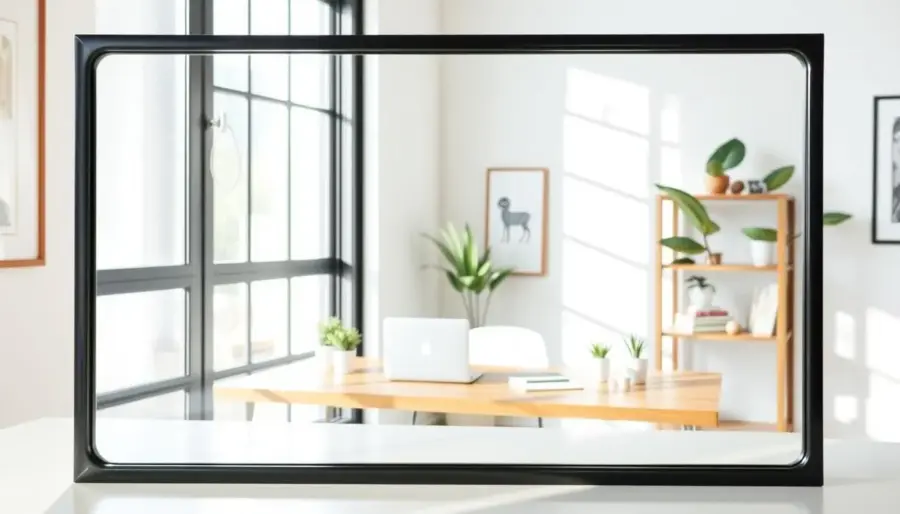
Reflection and mirrors: choosing the right mirror for the job
Selecting a mirror is less about style and more about how it redirects light and expands perceived space. Start by asking whether you want accurate images, wide coverage, or concentrated brightness. Your answer directs the type and placement.
Plane mirror fundamentals: virtual image behind the plane
A plane mirror redirects rays so they appear to come from a point behind the glass. The object distance equals the image distance, so the image size matches the object size. Use a plane mirror when you want consistent, undistorted images and a feeling of added depth without changing proportions.
Concave: focal point and focal length effects
Concave mirrors collect parallel rays to a focal point. The focal length (f ≈ R/2) sets how strongly the surface concentrates light. If an object sits beyond the focal length, the concave mirror can form a real image in front of the surface. Closer objects produce virtual images behind the glass. Only use concave mirrors when you need bright, localized highlights and can control hotspots.
Convex: wide coverage with reduced images
Convex mirrors diverge rays so images appear smaller and upright from a virtual focal point behind the surface. They spread light and widen viewing angles, making them useful for corridors or broad coverage rather than precise image fidelity.
- Plane: true-size image, low distortion.
- Concave: focal point control, possible hotspots.
- Convex: broader spread, reduced image size.
Place mirrors to bounce daylight deeper into the room
Use a mirror like a tool that redirects useful daylight so darker zones get steady illumination. Start by choosing a wall that will catch the strongest window beam and send it inward.
Position opposite or adjacent to windows
When possible, mount a mirror opposite a window so it captures direct light and returns it into the room. If an opposite wall is unavailable, place a mirror on the side to act as a light turn toward the far side.
Aim the bounce using the angle of incidence
Remember the law reflection: the angle of incidence equals the angle of reflection. Tilt and rotate the mirror so the incoming ray produces an angle that lands on your chosen target. Small orientation changes alter where rays travel.
Target dark spots and design behind mirror sightlines
Aim reflections at the back wall, shadowy corners, or the side blocked by tall furniture to increase perceived brightness. Place mirrors so the virtual scene behind mirror views shows calm surfaces, not busy paths. Do a quick test at different times: if you see the window or bright bulbs in the front mirror from your desk, you may need to adjust placement to avoid glare.
- Highest yield: opposite the window.
- Alternative: adjacent side to turn incident light.
- Comfort tip: avoid reflected light near monitors to reduce eye strain.
Upgrade other reflective surfaces beyond mirrors for a brighter workspace
Major brightness wins come from swapping finishes on wide surfaces, not just hanging a single mirror. You gain steady, usable light by choosing which wall and desk faces return rays into the room.
High-reflectance paint, whiteboards, and glass
Use high-reflectance paint on the back wall or the wall opposite the window to lift ambient light without creating distorted images.
Add whiteboards or glass boards where they catch incoming rays; they send clean, usable light back across the room.
Polished metal and light-colored desktops
Introduce polished metal accents sparingly for controlled specular reflection highlights. Small shiny points from lamp arms or pulls give crispness without permanent glare.
Choose light-colored desktops and desk pads so the surface near your work returns useful light at the point you read or write.
Diffusing panels and matte finishes
Where you see hotspots, add diffusing panels or matte finishes. Diffuse reflection scatters rays over a wider area to reduce harsh points and eye fatigue.
- Strategy: favor large-area upgrades for broad gains.
- Balance: use specular surfaces for reach and diffuse choices for comfort.
- Result: a brighter, calmer office with fewer glare surprises.
Conclusion
A small, well-aimed surface can send useful rays to the exact point that needs more brightness. Use the law of reflection to set the angle so the bounce lands on a target object rather than a glare source.
Keep it simple, start by mapping your light sources, noting reflective finishes, and marking dark zones. A plane mirror often works best because it creates a stable virtual image behind mirror glass and bounces light without distortion.
Reserve curved options: convex mirrors widen coverage in corridors; concave mirror effects can create hotspots if you’re not careful. Before you finish, sit in your chair and check for front mirror glare and unwanted bright spots.
Action plan: choose one wall or corner, add one mirror with a tested angle, pair it with one lighter surface, then re-check brightness at morning, midday, and late afternoon.