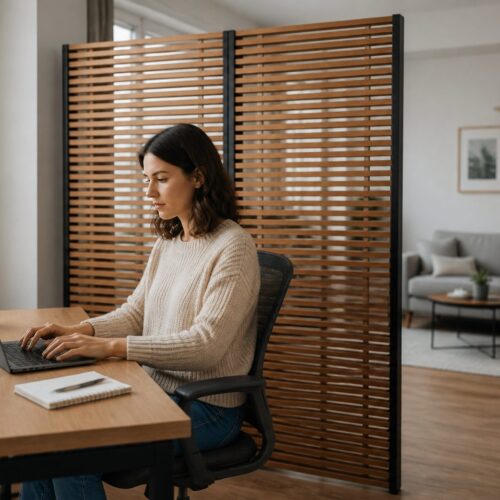
You can turn a living area into a useful workstation without making it feel like an office. Console desk integration blends a slim profile with real workstation features so your room stays a room.
Start by planning placement and measuring sightlines. Then add power, cable routing, and cooling in a logical order. This sequence keeps equipment safe and the view uncluttered.
Purpose-built consoles differ from ordinary desks. They focus on device load, cable paths, and ergonomics. That focus translates well to compact layouts and shared environments.
Choose low visual weight and clean sightlines so monitors and laptops sit tidy without blocking circulation. Your goals are simple: a stable surface, protected equipment, safe power, and a neat back-of-surface look.
Treat your living room setup like a small operating hub—serviceable, comfortable, and design-forward—without an industrial feel. The rest of this guide will show you how to plan and execute each step.
Plan Your Living Room Workspace for a Slim Console Setup
Choose a spot that balances light, sightlines, and daily routines before you buy any furniture. A short planning process saves time and reduces returns. Start with simple mock-ups and test real movement through the room.

Pick the right work zone
Map traffic flow so your setup does not pinch walkways or block views. Place the unit where chair movement and cords stay out of main paths.
Measure for a low-profile fit
Measure the true footprint: include clearance for a chair, baseboards, and cable space. Prioritize shallow depth so the surface feels open without losing desktop space for keyboard and devices.
Define requirements before you buy
List every device and required storage. Decide what stays on top versus what can hide below or behind. Plan under-surface storage early to avoid clutter later.
- Protect sightlines: keep displays low so the room reads as living space first.
- Use light: place the unit to avoid glare from windows and TVs.
- Test quickly: tape outlines or cardboard templates to confirm ergonomics and reach.
Console desk integration with Built-In Technology and Clean Cable Management
Design your console area so it supports real equipment and daily workflows. Pick a platform with deliberate routing, sturdy construction, and room for power modules so you avoid a decorative unit that can’t handle hardware.

Select a console design that supports equipment
Choose a unit rated for the weight and heat of your setup. Look for built-in channels, post mounts for monitor arms, and quick-connect looms for fast serviceability.
Under‑desk PC storage and heat control
Use lockable under-desktop cabinets to hide and protect PCs. Vented doors, fans, and a clear rear exhaust path keep operating temperatures down.
Cable routing, rear trays, and power access
Layer your cable management: under-desk trays, cable chains for moving parts, and bundled looms. Add rear trays and sliding access for power supplies and modules.
- Mount monitors on post arms to free surface area and improve posture.
- Place desktop power units within reach to reduce under‑desk crawling.
- Plan cooling and service paths so your equipment stays reliable.
Dial In Comfort and Everyday Usability for Working at Home
Small adjustments to height and light make big differences in daily comfort. Start by setting a surface height that keeps your forearms supported and shoulders relaxed. Height-adjustable units let you switch between seated and standing throughout the day, and keypad presets make those shifts quick and repeatable.
Set the right height for seated and standing posture
Match the surface height to how you actually work, not to a number on paper. Use micro-adjustments so your wrists stay neutral and your upper arms hang comfortably.
Check cable lengths and monitor placement so everything still operates when you change height. Adjustable monitor arms reduce neck and eye strain and support better posture when you move between sitting and standing.
Add task lighting that reduces glare
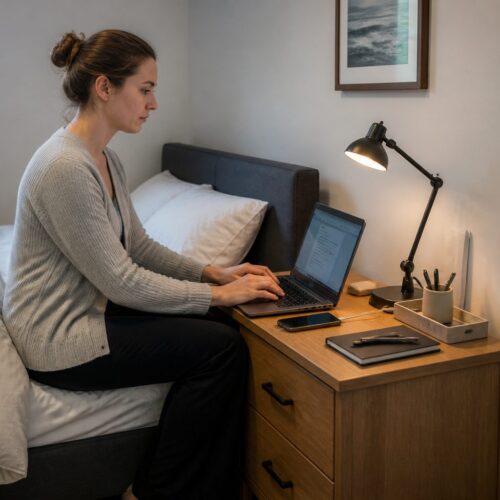
Choose focused lighting that brightens the work plane without reflecting on screens. A directional lamp with dimming control improves visibility for long stretches and keeps the living-room environment pleasant at night.
- Use adjustment often — small changes cut fatigue.
- Prioritize front-edge support to protect wrists and reduce strain.
- Evaluate over time and tweak settings after a few days of real use.
Conclusion
Aim for a finished setup that balances clean lines, service access, and everyday control. A slim console applied with purpose-built design makes a living area feel like furniture first and a workstation second.
Start with space, measurements, and needs. When you plan those things, hardware, cable routing, and integration become simpler to implement and maintain.
Adopt a control mindset: organize gear so daily use is smooth and service is quick. Treat consoles and desks as part of the room’s flow, not an afterthought.
Next step: review the checklist—equipment, heat paths, cables, monitor placement, and power access—and make one upgrade at a time. Small, tested changes keep the setup reliable for years.