Discover the cabinet-style “office in a box” and how it helps you run a functional workspace while keeping your home calm. This compact solution closes up when you need a reset and fits small rooms or multi-use areas common in the United States.
You’ll learn practical steps: measure your room, choose the right furniture, map internal zones, and keep the setup efficient over time. Expect tips that work whether you prefer DIY and thrift picks or ready-to-assemble units.
Why internal storage matters: when every shelf, drawer, and door pocket has a role, you waste less time hunting for supplies. The guide shows how to treat the piece like a mini workstation with a writing desk surface, computer needs, and neat tech management.
Success metrics are simple: clear base area, easy access to daily tools, controlled paperwork flow, and tidy tech. These goals will help you make the most of limited space and create a calm, productive home office.
Why a Cabinet-Style “Office in a Box” Works in a Home Office
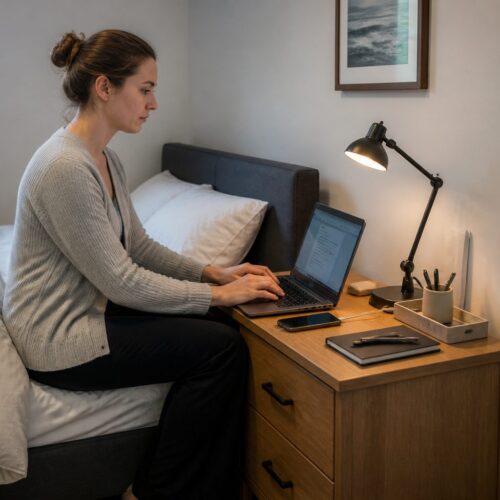
A compact, closable work cabinet turns a shared room into a focused workspace in seconds. You get a clean visual break: doors shut and the living space looks like home again.
Quick resets matter when you share a house with others. A closeable box hides paperwork, cords, and bulky devices so family life can continue without distractions.

When you need a workspace that closes fast in a busy house
Use the cabinet to create clear boundaries for work. Open it to focus and shut it to relax. This helps reduce visual clutter and keeps tasks discrete in a busy home.
How armoires help you tuck away computer equipment and paperwork
Smart internal storage keeps your computer desk gear, printer, and paperwork within reach but out of sight. Built-in cubbies, drawers, and slide-out shelves make access simple without crowding a living area.
- Close doors to restore the room’s home feel fast
- Define a focused work zone when open
- Hide printers and computer equipment yet keep them usable
- Prioritize cubby space, drawers, and slide-outs for tight rooms
- Works as a full computer desk or a small writing desk inside a box
Assess Your Room, Wall, and Available Area Before You Bring in Furniture
Before you buy, take simple measurements that show how the piece will live in your room and against a wall. A little prep avoids awkward fits and blocked walkways.

Measure the footprint, door clearance, and the back-to-wall setup
Measure the actual floor area, including the chair pull-back so the new furniture won’t block traffic. Check door clearance and the full depth of the cabinet when doors swing open.
Leave a small gap at the back for cords and ventilation. That gap keeps cables tidy and the unit stable against the wall.
Plan for corners, edges, and tight spaces
Account for baseboards, vents, and uneven floors that shift door alignment. Corners and edges matter because handles or swing paths can hit nearby furniture or walls.
- Map the real footprint with painter’s tape to visualize the area.
- Decide if a slim unit along a long wall or a deeper unit on a short wall fits your space best.
- Use a quick checklist for corner placement, trim, and clearance before you buy.
Armoire Office Layout: Plan the Interior Like a Mini Workstation
Start by treating the cabinet interior as a tiny, efficient workstation with clear zones for tasks. Define three areas: a computer zone, a writing desk zone, and a storage space zone so items don’t compete.
Choose the right size work box by listing supplies and devices you use daily, weekly, and rarely. Fit your daily items first—keyboard, laptop, pen holder—then add room for weekly printers and rare archive boxes.
Use vertical space with shelves above the base to free legroom and permit slide-outs for printers or bins. High shelves hold rarely used things; middle shelves keep project supplies handy.
- Keep high-use items at eye level to save time.
- Place medium-use items within arm’s reach.
- Store low-use things higher or lower to maximize usable surface.
Balance open surface vs contained storage so your writing desk stays usable instead of turning into clutter. When everything has a zone, you cut setup and cleanup time and can close the doors fast.
Plan for growth: allow extra shelf height or a spare drawer for new projects, paperwork, or tech so the space stays functional months from now.
Choose the Right Armoire Design Features for Efficient Internal Storage
Pick design features that make daily access faster and cleanup nearly automatic. A thoughtful set of cubbies, drawers, slide-out shelves, and door options turns a compact work box into a fast, usable system.
Cubbies for quick-grab supplies
Cubbies keep frequently used items like pens, notepads, and a stapler visible and easy to grab. Use small bins in cubbies to group mail and project bits so the surface stays clear.
Drawers for paperwork, cords, and small boxes
Deep and shallow drawers stop small items from scattering. Reserve one drawer for cords and adapters, another for paperwork and labels, and a third for odds and ends.
Slide-out shelves for printers and bulky machines
Slide-out shelves let you pull a printer into use without lifting or rearranging. Prioritize weight capacity and smooth glides if you plan to hold heavier devices on the shelves.
Door style: sliding vs swing
Sliding doors save room because they don’t swing into walkways. Swinging doors give wider access but need clearance. Choose the style that matches your room and daily habits.
- Check how smoothly drawers glide and how much weight shelves can hold.
- Measure cubby widths so chargers and small boxes fit without crowding.
- Tie each feature back to one goal: faster retrieval and easier end-of-day resets.
Set Up a Clean Work Surface Inside the Cabinet
Design a clear desktop inside the cabinet that supports both screen work and paper tasks without clutter. A tidy surface saves time and keeps your workspace ready to close in seconds.
Choose between a pull-out tray and a fixed writing surface
Pick a pull-out tray if you need flexibility. It hides fast and frees the base when you’re done.
Choose a fixed writing desk surface when you want more stability and a larger work area. A fixed surface often works better as an office desk for heavier gear.
Ergonomics and the base area
Set keyboard height so your forearms are parallel to the floor. Position the monitor at eye level for a clean computer desk posture.
Leave enough base space for legroom. Small changes in surface height and depth make long sessions more comfortable.
Prevent clutter with a “working zone” rule
Keep the surface clear except for the items you need for the current task. Limit the top to one notebook, one file, and one device to cut prep and reset time.
- Keep supplies off the top with vertical cubbies and drawer organizers.
- Designate a charging spot to corral cables and preserve space.
- For hybrid use, split the surface left/right: one side for a computer desk setup, the other for writing desk tasks.
Optimize Drawer Storage With Simple Categories That Stick
Give every drawer a job: that simple move saves minutes each day. A three-tier system keeps things useful and stops clutter from multiplying.
Daily-use drawer, project drawer, and deep storage
Use one drawer for daily tools: pens, sticky notes, chargers, and small supplies you grab every morning. Keep the second drawer for active projects and current paperwork so everything for a task stays together.
The deep storage drawer holds backups: extra ink, bulk labels, and boxes you need less often. That separation saves you time when you need a single piece quickly.
Small organizers and simple labels
Small organizers stop drawer drift. Use dividers or tiny bins so supplies don’t migrate into other zones. Label each slot with clear words so anyone at home can return a piece to its place.
- Monthly quick scan: remove duplicates and mystery items.
- Fewer categories beat overly detailed systems that take too much time to keep.
- Consistent setup reduces decision fatigue and speeds retrieval during busy work sessions.
Keep the approach simple and check drawers regularly for small adjustments. The right details make the storage system last and keep your work time focused.
Build a Shelf System That Matches Your Workflow
Arrange shelves so the things you grab most sit at eye level and the rest stays out of the way. Assign each shelf a clear job based on how often you use items. That way, your workflow feels natural when the doors are open.
Top shelves: archive and rarely used decor
Use top shelves for archive paperwork, spare supplies, and decor pieces you like but seldom need. Keep backups and seasonal items here so the middle area stays uncluttered.
Middle shelves: your active zone
Make middle shelves the hub for devices and ongoing projects. Store the items you reach for daily at arm’s reach to speed work and reduce interruptions.
Bottom shelves: heavy items and bins
Reserve the bottom for heavier boxes and storage bins. This keeps the cabinet stable and protects your back when lifting.
- Protect the base area: leave clearance for legroom or a pull-out tray so the working area remains comfortable.
- Limit decor to a few small pieces so they don’t compete with functional storage in tight space.
- Measure shelf spacing to avoid wasted vertical space above devices and bins.
Create a Paperwork and Filing Flow That Prevents Piles
Design a three-step paperwork flow so mail and forms move quickly from arrival to archive. A compact, repeatable system inside your cabinet keeps the writing surface clear and helps you close the doors without shuffling stacks.
In-tray, action tray, and file-away zone
Set three stations inside the cabinet: an in-tray for new mail, an action tray for items that need your attention, and a file-away space for finished paperwork. Place them left-to-right so items flow naturally when you open mail.
Position folders where you open mail
Keep labeled folders and a small file box near the in-tray so filing becomes a one-step habit. Limit the action tray to a single slot so tasks don’t overflow and force weekly processing.
- Daily quick sort: handle urgent pieces and toss junk.
- Weekly file-away session: move completed paperwork into storage folders.
- Monthly shred/recycle: clear expired documents to save space and time.
- Separate household from work paperwork to protect your home admin from invading your office workflow and area.
Hide Cords, Power Strips, and Tech Without Losing Access
A simple cable plan keeps power and data lines out of sight but never out of reach. Start by reserving a single cable corner at the back where all cords meet. That prevents tangles and keeps the rest of the space clean.
Mount the power strip so switches and plugs face outward. Use a shallow shelf or a bracket high enough to reach without pulling apart drawers. This keeps the power strip accessible and safe.
Keep the back panel tidy with clips, ties, or adhesive channels. Route data and power cables in separate groups so you can find the right cord fast. Label both ends of key cords to speed troubleshooting and swapping devices.
Leave ventilation room around computer equipment and printers. Allow a small gap at the back and avoid stacking hot devices. Good airflow prevents heat buildup inside the closed unit.
- Power on one side, data cables grouped on the other
- Manage slack so slide-out shelves move freely
- Use ties and channels to keep the back accessible for service
Keep the goal clear: hidden but accessible. Your tech stays visually out of the way while you can still reach and service it in minutes.
Use the Back Panel for Visual Management (Notes, Lists, and Reminders)
Turn the rear wall of your work piece into a visual system that guides your day. The back panel is prime real estate because it is in view while you work and fully hidden when you close the doors. This keeps your home office tidy and helps you focus.
Add a cork board to pin notes where you can’t miss them
Pin a small cork section to the back to hold quick-reference lists, appointment cards, and sticky reminders. Keep only a few pins so the space stays useful and not cluttered.
Reinforce thin cork with wine corks for better pin cushion support
If the cork is too thin, hot-glue wine corks in rows over the surface to build thickness. This DIY fix creates a stronger pin cushion so notes stay put and you save time digging for loose papers.
Create a chalkboard section for your to-do list
Paint a small black chalk area beside the cork for a running to-do list. Clip chalk to the back with a clothespin so it stays handy. A short, daily list reduces sticky-note overflow and keeps priorities visible.
- Keep the system minimal: a few pinned notes and one short list.
- Use the back panel to cut down on loose paper and speed up decision time.
- The result: a cleaner look when open and a fully hidden setup when closed.
Maximize Door and Interior Wall Space for Extra Storage
Use every inch of door and interior wall space to add handy storage without shrinking your main workspace. These hidden spots free shelf and drawer room while keeping daily items easy to reach.
Add hooks, pockets, or slim racks for small tools and headphones
Attach adhesive hooks, fabric pockets, or slim metal racks to the inner doors or side walls. They hold headphones, scissors, charging cables, and small tools so your desktop stays clear.
Keep door storage lightweight so doors align and close cleanly
Limit items on door panels to lightweight supplies only. Heavy loads cause sagging and misaligned hinges that make the piece hard to close.
- Use slim organizers to avoid collisions with shelves or cords when closing.
- Create one “grab-and-go” door zone for the supplies you use every day.
- Place hooks near the edge so items don’t catch on drawers or slide-outs.
- Quick audit tip: if doors begin to stick, remove weight and rebalance contents immediately.
Tie door storage to the overall design so it supports your workflow rather than becoming a catchall. Keep labels and consistent spots for items and you’ll save set-up time each day.
Finish and Color Choices That Make the Workspace Feel Organized
A thoughtful finish and color palette can quiet visual noise and make your cabinet feel orderly before you touch a single drawer. Small surface choices set the tone so your storage reads as intentional furniture, not clutter.
Why chalk-style paint speeds the refresh
Chalk-type paint cuts prep time because you often skip sanding and primer. You save time and still get a uniform finish that hides minor imperfections.
How to get a calm, aged look without overdoing it
Apply two coats of gray chalk paint for solid coverage. Then use 220-grit sandpaper to lightly distress corners and edges. The gentle abrasion creates a controlled aged look without exposing raw wood.
Add subtle stencil detail that stays quiet
For interest, add a lattice stencil with white chalk paint applied sporadically rather than fully filled. This creates a soft pattern that reads as texture, not busy decor, when the doors are open.
- Neutral body + subtle pattern = a calm overall look
- Two coats for coverage; 220-grit for gentle distressing
- Pick a finish you can touch up easily if daily use wears it
Durability tip: choose a chalk finish with a clear matte topcoat for protection. That keeps the piece looking organized longer and makes quick touch-ups simple when you need them.
Materials and Build Quality: Solid Wood, Faux Options, and Grain
Choosing the right material determines how your cabinet performs over time. Material affects durability, repair options, and how often you’ll need to fix hinges or slides.
How materials change durability and feel
Solid wood offers stronger joints and easier repairs when a hinge loosens or a shelf sags. It also feels firmer under a keyboard, similar to a solid wood desk surface.
Solid wood vs faux: trade-offs
Faux panels cost less and resist warping from humidity, but they dent more easily and are harder to refinish. Solid wood takes stain and paint better and can be sanded or repaired.
Grain and finish matters
Grain patterns hide or reveal scratches differently. Open, pronounced grain shows wear but accepts stain well. Tight grain keeps a cleaner look under heavy use.
What to check in-store
- Open/close cycles: test doors and drawers for smooth travel.
- Hinge action: no grinding or wobble when you swing doors.
- Shelf supports: press gently to check for sag under weight.
If you need a compact alternative to an executive desk, a well-built cabinet can replace or complement it—just confirm the desktop won’t flex when you type.
Buying Paths: Thrift Finds vs Ready-to-Assemble Computer Armoires
Decide whether you want a bargain project or a predictable, fast setup. A secondhand piece can be a great value if the interior already suits your needs. New, ready-to-assemble cabinets give consistent dimensions, cable management, and choice of finish.
Inspecting secondhand furniture for a workable interior
At a thrift store, look for cubbies, working drawers, slide-out shelves, and doors that close cleanly. A $40 find can be perfect if the interior is sound.
- Check drawer slides and shelf support for sag.
- Ensure doors align and hinges aren’t loose.
- Confirm there’s room for a printer and a clear computer zone.
Retail computer cabinets and finish choices
When you buy new, you pay for uniform panels, modern cable access, and a polished finish. Brands like Sauder® offer models such as Harvey Park® in Grand Walnut and Select Craft & Sewing in Mystic Oak, Pacific Maple, and Soft White.
Match configuration to your room and storage needs
For a tight room, prefer sliding doors and tall, vertical storage. In a larger room, choose wider or deeper cabinets to hold bulky machines and paperwork.
Daily Habits That Keep Your Cabinet Office Efficient Over Time
Small daily rituals keep your workspace ready and cut the time you spend hunting for tools. A predictable end-of-day reset helps you shut the doors on a clear surface so your morning starts fast.
- Return tools to their drawers or cubbies.
- File or place paperwork in the action tray—avoid restacking loose piles.
- Coil cords into the cable corner and tuck the power strip into its spot.
- Clear the writing area so the surface is ready to use.
Do this routine daily and you save real time. When you open the unit the next morning, you can start work without re-sorting or hunting for supplies.
Weekly purge
- Pick one day to remove mystery items: toss, assign a storage spot, or donate.
- Process paperwork: keep what’s needed, file essentials, shred or recycle the rest.
- Top up supplies and remove duplicates that slow you down.
Consistency matters more than perfection. Small weekly actions protect your storage from overwhelm and extend the life of hinges, slides, and shelves. Over time, these habits keep your home space organized and make the cabinet a reliable workspace that saves you both time and frustration.
Conclusion
Wrap up with a clear checklist: assess your space, plan interior zones like a mini workstation, choose smart features, and keep a short daily reset routine. These steps make setup fast and repeatable.
The main benefit for your home office is simple: a compact unit that combines functionality style while keeping visual clutter under control. Prioritize usable interior storage over exterior looks for real daily gains.
Highest-impact upgrades: zoned shelves and drawers, a clear working surface, a three-step paperwork flow, cable management, and a back-panel visual system. These changes cut setup and cleanup time.
Choose thrift if you want value and customization; choose retail for predictable dimensions and finishes. Note that made solid wood construction can pay off for long-term durability.
When you compare products later, check build features alongside review signals like rated stars.1 total. Retail notes referenced here were current as of sat feb 2026—confirm pricing and availability before you buy.