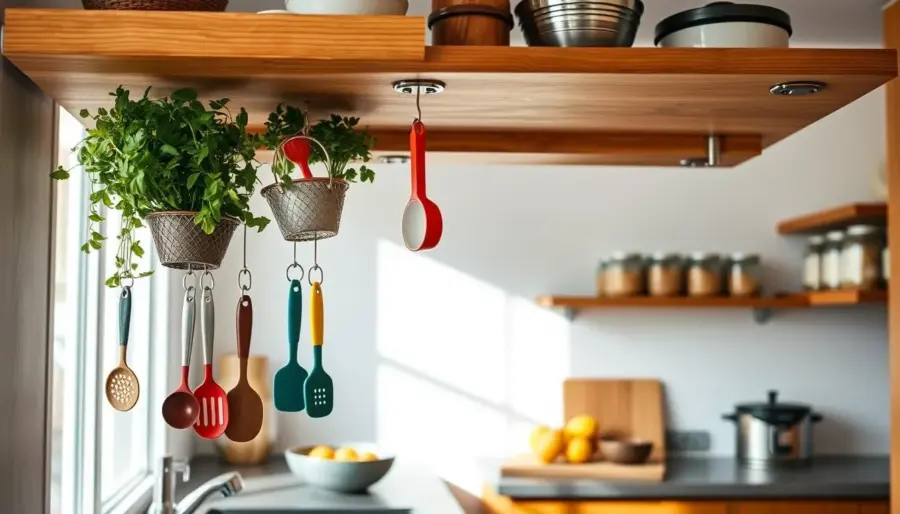
You often miss the narrow gap beneath a shelf, but that thin band can be full of potential. By using simple hanging baskets and hooks you can turn dead space into handy storage in your kitchen, pantry, or bathroom.
Measure first and choose right: you’ll learn to measure clearance, pick baskets or hooks that fit, and install them so they stay stable over time. Most options are low-tool and renter-friendly, so you can avoid drilling if needed.
Success means clearer countertops, faster access to everyday items, and more usable space without making shelves feel cramped. Hanging solutions act as a practical organizer upgrade for small apartments and larger homes alike.
Later sections will cover baskets, hooks, racks, strips, and under-cabinet add-ons so you can match solutions to your layout and habits. Expect easy projects that boost storage and reduce visual clutter.
Key takeaways: quick wins for extra storage, simple prep steps, renter-friendly installs, and choices that keep shelves tidy.
Why under-shelf storage works in kitchens, pantries, and bathrooms
What looks like wasted air under a sideboard can become a neat spot for everyday items. You can reclaim that narrow space to keep things handy and keep surfaces clear.

What “dead space” looks like under shelves, cabinets, and sideboards
Dead space shows up as shallow gaps where nothing fits, yet items pile up on countertops. Forgetting these zones is a common way people waste room and add clutter.
How under-shelf organizers reduce countertop and drawer clutter
Smart organizers put frequently used items within reach and free drawers for tools that need enclosure. This works especially well in a kitchen and pantry, where access matters.
- Spot gaps under shelves, cabinets, and sideboards and move small items off counters.
- Use baskets or hooks to store grab-and-go goods and reduce drawer and drawers crowding.
- In the bathroom, vertical racks keep sink areas clear and speed morning routines.
- Keep the approach light—don’t overcrowd. A tidy system stays usable and attractive.
Result: better cabinet flow, clearer countertops, and simpler organization that saves space without changing your shelves.
Measure and assess your shelf before you buy anything
Start by sizing your shelf so any basket or hook will fit and stay secure. A few quick measurements save you time and stop common mistakes.

Check thickness, depth, and height clearance
Measure shelf thickness so slide-on baskets sit snug and screw-in hardware uses the right screw length. Then measure depth and the height under the shelf. This prevents baskets from blocking tall items or keeping cabinet doors from closing.
Identify what you’ll store
List the exact items you plan to keep: utensils, spice refills, paper goods, small tools, or packaged food. Match basket size and hook style to those items so the organizer supports real needs.
Plan access zones to avoid overcrowding
Think front (daily reach) and back (rare use) areas. Put grab-and-go items near the front and stow backups in the back. A balanced plan keeps cabinet storage usable and prevents clutter.
- Pro tip: Measure once, write dimensions, and shop by those numbers to cut return trips.
Under-shelf utilization: choosing between hanging baskets, hooks, racks, and strips
Small clearances beneath a shelf hide smart chances to tidy up and keep everyday tools within reach. Picking the right option depends on item shape, weight, and how often you reach for it.
Material and finish: wire, metal, and coated choices
Wire gives visibility and airflow, ideal for snacks or dish towels. Metal adds strength for heavier jars and long utensils. Coated finishes are easier to clean and soften the look to match your kitchen design.
When hooks, baskets, racks, or strips make more sense
Use hooks for mugs, towels, and tools you grab fast. Hooks keep items suspended and easy to access.
- Baskets corral loose packs, spice refills, and paper goods that tip or roll.
- Racks work best for long utensils, hanging towels, or spice jars that benefit from being draped or stored visibly.
- Magnetic strips are the neat solution for knives or metal spice tins when safety and a clean look matter.
Match finish and style so organizers feel intentional. A single coordinated design ties these small additions into your kitchen rather than making them look like random bits.
Tools and materials you’ll need for a clean install
A few basic tools make a clean install fast and keep your shelf edges scratch-free. Gather a small kit so you save time and avoid mistakes during setup.
Basic tools that save time and prevent shelf damage
Start with a tape measure, pencil, small level, and a screwdriver set. Add a drill only if you plan screw-in mounting.
- Tape measure and pencil for accurate placement.
- Level — it makes a real difference on open shelves where uneven baskets show.
- Screwdriver set and a drill for bracket or hook installations when needed.
Optional upgrades for heavier items and long-term stability
Protect shelf surfaces with felt pads or thin liners under slide-on metal brackets to cut scratches and reduce vibration.
Whether ’re installing inside a cabinet or under open shelving, pick the right screws or anchors and plan alignment for multiple attachment points.
For heavier goods, choose higher-quality hardware, better anchors, and thicker-gauge metal baskets that resist bending.
Safety note: always follow manufacturer weight ratings and test loads so your setup stays secure and you can trust the system you use.
How to install under-shelf hanging baskets step by step
With the right mount, a basket under your shelf becomes a reliable spot for everyday goods. Follow simple steps to choose a no-drill slide-on option or move to screw-in mounting for heavier loads.
Slide-on baskets for shelves with no drilling
Easy, renter-friendly way: confirm shelf thickness, slide the bracket fully onto the shelf, and press until the fit is snug. Test for wobble before loading.
Screw-in mounting for heavier goods and deeper baskets
Choose screw-in brackets when baskets will hold heavy items or see frequent pull. Pre-drill pilot holes, align brackets, and fasten with the recommended screws to avoid splitting wood.
Weight limits, load testing, and preventing sag over time
Start light and spread weight evenly. Check for sag after 24 hours and re-tighten hardware if needed. Place heavier items near mounting points and avoid loading the front edge only.
Best placements inside a cabinet, pantry area, or open shelving
Install inside a cabinet for hidden storage, in a pantry area for snacks, or under open shelving for daily kitchen essentials. Check clearance, door swing, and height so baskets don’t block tall bottles or doors.
- Quick tip: Keep each basket a category zone—don’t overfill.
- Rotate load testing after major changes to cabinets or shelves.
- Use coordinated baskets for a tidy, intentional look.
How to add hooks under shelves for fast-grab organization
When you hang hooks under a shelf, you create micro-organizers that make routines faster and keep counters clear. Start by deciding what you want to hang—mugs, utensils, or small baskets—and plan spacing so each item hangs without bumping its neighbor.
Spacing hooks for mugs, utensils, and small organizers
Leave about 3–4 inches between hooks for mugs so handles don’t collide. For utensils, allow 2–3 inches so spoons and spatulas swing freely.
Group similar items together. That keeps grab-and-go items at the front and less-used tools farther back.
Adhesive vs. screw-in hooks in humid spaces like bathrooms
Adhesive hooks are renter-friendly and quick to install. They work well in dry kitchen spots and on smooth cabinet undersides.
In a bathroom or any humid area, adhesives can fail. Choose screw-in hooks for long-term strength and check hardware ratings before hanging heavy items.
- Placement tip: mount hooks toward the front underside of shelves for easy access but far enough back to avoid doors or trim.
- Match hook finishes to your decor and style so visible storage looks intentional.
- Keep loads light-to-moderate; reserve heavy items for rated mounting points.
What to store in hanging baskets vs. what belongs in drawers and cabinets
A simple rule helps you decide quickly: keep lightweight, visible items in baskets and tuck fragile or sharp goods into drawers or cabinets. This keeps counters clear and makes daily routines faster.
Ideal basket items
Use baskets for lightweight goods you reach for every day. Examples include snacks, spice refills, dish towels, and paper goods. Baskets make these items visible and easy to grab.
What to keep in drawers and cabinets
Store sharp tools, fragile pieces, and anything that needs protection from dust or splashes in drawers or cabinets. Drawers work well for utensils and small appliances that should stay out of sight.
Pairing drawer dividers with baskets
Drawer dividers make a strong complement to baskets. Use dividers for measuring spoons, bag clips, and packets so small items stay sorted and won’t spill into other drawers.
- Keep one category per container to maintain long-term organization.
- Avoid storing heavy appliances or messy trash in hanging solutions—these can exceed weight limits or attract pests.
- Review seasonally and move seldom-used items to cabinets while keeping daily items in the easiest-to-reach spot.
Smart under-cabinet additions that complement under-shelf organizers
Smart drawers and sliding shelves make deep base cabinets accessible and cut down on bending and fishing for items.
Pull-out drawers and sliding shelves for pots, pans, and pantry goods
Pull-out drawers bring pots and pans forward so you don’t stack or crush cookware in the back. Sliding shelves do the same for pantry goods, moving the shelf to you instead of the other way around.
Hidden trash solutions vs. slim pull-out trash cans
Hidden trash drawers fit inside cabinets and seal odors better. They give a built-in look and are easier to clean around.
Slim pull-out trash cans slide beside a cabinet or under a counter. They are renter-friendly and quick to install when you don’t want full remodel work.
Under-cabinet vacuum options if you’re renovating
An under-cabinet vacuum (think Sweepovac-style) is a renovation-friendly upgrade that helps with crumbs and quick cleanups. If you don’t remodel, a broom caddy or slim trash option gives similar daily convenience.
- Decision guide: rent or avoid remodels? Choose slide-in or pull-out inserts.
- Remodeling? Consider built-in drawers and an under-cabinet vacuum for a seamless finish.
- Pair these additions with hanging baskets and hooks so your whole cabinet system works together, not against each other.
Borrow ideas from under-sideboard and toe-kick spaces for extra storage
You can reclaim the shallow recess under a sideboard with slim drawers or low rolling baskets. This hidden zone is a smart way to add usable storage in a small home without changing cabinet layout.
Toe-kick drawers for flat items like baking sheets and linens
Toe-kick drawers make a big difference when every cabinet is full. Interior designer Alice Moszczynski recommends them as hidden compartments for baking sheets, pet bowls, and linens.
Be realistic: toe-kick drawers often need a custom millworker. Budget for professional help when your floor height or framing is unusual.
Rolling bins and storage baskets that slide out easily
As an accessible alternative, organizer Shantae Duckworth suggests low rolling bins or baskets under sideboards and credenzas. These slide out easily and work well for seasonal linens, extra paper goods, and craft supplies.
- What to store: seasonal linens, extra paper goods, and low-use items you still want on hand.
- Why it helps: sliding, low-profile storage tucks away cleanly and reduces visual clutter until you need an item.
- Fit check: measure the height under the furniture and choose bins with wheels or low-friction bases so pulling them out is effortless.
Make it look intentional: design, decor, and matching organizer styles
Intentional styling turns simple storage into a thoughtful design element in your kitchen or pantry.
Match finishes and shapes. Pick one or two metal tones—black, brass, or chrome—or a single white-coated finish. When hooks, baskets, and racks share a finish, they read as a cohesive part of your room’s design.
Choose a consistent container family for open shelves. A uniform shape or weave keeps the view calm and makes inventory quick to scan.
Balancing visible and concealed storage
Keep everyday items visible for fast reach. Hide backups, ugly packaging, or bulk goods in cabinets to cut visual clutter.
Quick rule: visible = daily; concealed = spare. That balance keeps counters and open shelves tidy without sacrificing access.
Simple style guide to maintain cohesion
- Limit finishes to two max.
- Use one container shape family for the pantry.
- Rotate and declutter: if an organizer becomes a catch-all, reset categories before adding more bins.
Lighting and finishing touches that improve function without remodeling
Lighting does more than brighten a surface — it improves how you use cabinets and makes the whole kitchen feel larger. Accent light under cabinets helps you see into deep shelves, speeds prep work, and makes cleaning easier.
Under-cabinet lighting for better visibility and a bigger-space feel
Under-cabinet lighting reduces shadows on countertops and inside shelves. That reduction in contrast creates a bigger-space feeling even when storage is full.
Bar Zakheim of Better Place Design and Build recommends accent lighting under cabinets to aid navigation in the dark and to lift the room’s overall scheme.
Motion-activated strips for nighttime navigation and path lighting effects
Motion-activated LED strips are a budget-friendly way to add safety and convenience. They turn on automatically so you can move through the kitchen at night without using harsh overhead lights.
- Product tip: Philips Hue LED strips can be cut to size and controlled by phone or voice for flexible scenes.
- Use motion-activated strips where you need simple, no-app control and a lower cost point.
- Install toe-kick or floor-level strips for subtle path lighting that guides movement and reduces glare.
Placement tips: hide strips behind cabinet lips to avoid hotspots, run wiring along trim or behind molding, and stick adhesives to clean, dry surfaces for lasting hold.
Conclusion
A single shelf makeover often delivers the biggest storage gains in a small kitchen.
Measure your shelves, pick the right organizer type, and install with the correct tools for your surface and load.
Keep organization simple: avoid overcrowding, keep high‑use items within reach, and assign clear categories so your storage stays tidy.
Start small—tackle one cabinet or one shelf first. That way you test what works before you expand and you learn how you actually use each zone.
Best solutions by scenario: baskets for loose items, hooks for fast‑grab tools and mugs, and racks or magnetic strips when hanging access fits better.
Do this and your kitchen will gain usable space, cut clutter, and create a calmer workflow without a full remodel.