You’ll start by defining vertical wall storage as the practice of using upright surfaces to keep tools and supplies off your desk. This approach helps you go up so you don’t expand your footprint.
Expect a practical list you can mix and match: shelves, folding furniture, pegboards, hooks, door organizers, cabinet-door add-ons, tall shelving, and high-ceiling options. You’ll see simple storage solutions that fit a range of rooms and budgets.
The core benefit is clear: you get more usable space for work by shifting items onto wall real estate. That makes it easier to find what you need and keeps desktop clutter to a minimum.
This helps small offices, shared rooms, renters, and anyone who wants a tidier backdrop for video calls. You’ll also get a planning-first approach so you avoid awkward reach and visibility issues, plus safety tips on anchoring and weight limits later.
Why vertical storage matters for a clutter-free workspace
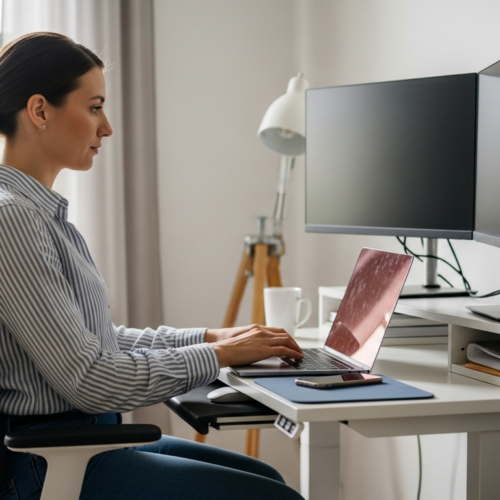
Clearing desk clutter starts with thinking upward instead of outward. When you maximize vertical space, your laptop and task materials stay front and center. That makes your desk a workspace, not a catch-all.

Keep frequently used items at eye level so you spend less time searching through drawers or piles. This small change speeds tasks and reduces interruptions to your workflow.
- Free desk and floor: Move cables, headphones, and mail up to clear the floor and make the room feel bigger.
- Find “found” space: Unused wall real estate often becomes useful storage in small rooms where every inch matters.
- Boost safety and flow: Clear pathways prevent trip hazards and keep movement smooth.
- Match your routine: The best solution holds the items you reach for most within easy reach.
Use these principles to reclaim space and create a calmer, more efficient office you enjoy using every day.
Plan your wall storage before you drill or stick anything up
Before you put a single hook in place, take a few minutes to plan where everything should go. This small step makes installation faster and keeps your walls cleaner.

Sort office items by how often you use them
Inventory what you have and sort items into daily, weekly, and rarely used groups. Place daily items where you can reach them without stretching.
Map zones for supplies, tech, papers, and personal items
Assign a zone for supplies, one for tech and cords, one for papers and mail, and a small spot for personal pieces to reduce visual clutter.
- Note wall width, outlets, and door swing before mounting anything.
- Match tools—hooks, rails, and shelves—to the item type you plan to hold.
- Protect clear pathways so the floor line stays open and trips are avoided.
Protect clear pathways to avoid trip hazards
Think of the best way to use the space so movement feels natural. Plan first—patching mistakes is harder than mapping once.
Vertical wall storage that works for office essentials
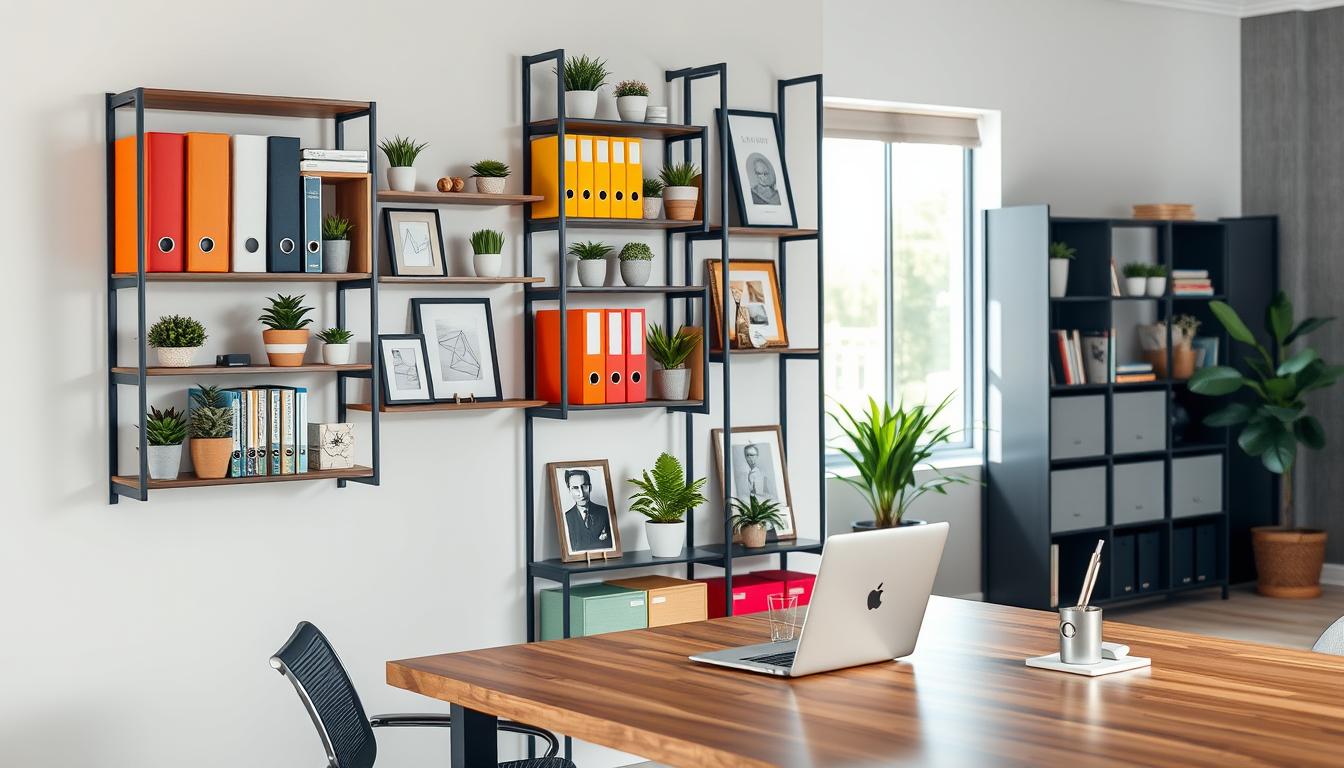
Choose the right shelving and you’ll move heavy items off your desk and into clear, reachable spots. Wall-mounted shelves maximize your usable space and let you display decor, books, and labeled bins without crowding the desktop.
Floating shelves for books, bins, and decor
Floating shelves give a clean, modern look. They hold books, matching bins, and small decor while keeping the room airy. Use them for daily items you want visible but tidy.
Bracket shelves when you need added support
Choose bracket shelves for heavy textbooks, a printer, paper reams, or metal organizers. Brackets prevent sagging and make it safe to store heavier loads off your desk.
Positioning for reach and visibility
- Daily: Place frequently used items between shoulder and eye level.
- Heavy: Put bulky boxes lower to avoid strain when lifting.
- Display: Arrange decor and accent pieces higher for visual balance.
Mind shelf spacing so binders and standing files fit without wasted gaps. Matching bins hide small clutter and keep the layout functional. Shifting bulk onto shelves reclaims desk space and simplifies your workflow.
Wall-mounted furniture that folds away when you’re done
Fold-away furniture turns tight corners into functional work zones that disappear when you’re done. A fold-down desk gives you a dedicated surface for email and laptop work, then tucks away to restore floor space.
Fold-down desks and small tables
Use a drop-leaf or fold-down table as your main work surface in a tiny room. It supports a laptop or notepad and clears when you need the area for other tasks.
Mounted cabinets as hidden storage and a room anchor
Choose cabinets that close to hide paperwork and chargers. Tall cabinets act as a visual anchor and make the area feel like a real office instead of a temporary nook.
- Practical uses: a fold-down table for laptop work, a cabinet for charging gear, a slim upper cabinet for backup supplies.
- Before you buy: check depth, door swing, and where your chair will sit when the desk is down.
- Why it helps: these pieces free floor area and help you maximize vertical without adding bulky furniture.
Pegboards, hooks, and magnetic strips for flexible daily grab-and-go storage
Make a small, flexible command center with pegboards, hooks, and magnetic strips so your most-used items are always within reach. These systems free desk surface and floor space while keeping essentials visible and easy to grab.
Pegboards that adapt to your workflow
Pegboards become a customizable command center because you can move hooks, cups, and small trays as your needs change. Use them for pens, label-ready bins, scissors, and a charger cup.
Hanging hooks and pegs for everyday gear
Hang headphones, cords, camera gear, small bags, and frequently used tools so they stop living in drawers. Proper hanging saves counter space and makes grab-and-go simpler.
Magnetic strips and rail systems
Magnetic strips create sleek storage for metal items like scissors, clips, and small office tools. They keep essentials visible without taking shelf room.
Rail systems act as a grown-up modular rack. Add S-hooks and small baskets to hold chargers, markers, and daily items. Think of the kitchen spice rail—small containers there work just as well for pens and markers in an office.
Placement and practicality
- Mount near your desk for easy reach, but not behind a door swing.
- Mix hooks and baskets so light tools sit higher and heavier items hang lower.
- Use labeled baskets and racks to keep the system tidy and repeatable.
Over-the-door organizers that add storage without taking up wall space
Over-the-door organizers give you extra room instantly and work great for renters or shared spaces. You hang a rack or hooks and gain usable shelving without drilling or altering walls.
Renter-friendly racks that require no drilling
Choose thin, metal or fabric over-the-door racks for supplies, chargers, and small tech. They keep counters clear and lift bulky items off chairs and tables.
Back-of-door hooks for jackets, bags, and headphones
Install simple hooks on the door back to create a drop zone for coats, bags, and headphones. This stops items from piling on chairs and makes them easy to grab.
Inside-door options for closets and cabinets
Use pocketed organizers or slim racks inside closet or cabinet doors to hide clutter while keeping it accessible. This approach helps the room look calmer and keeps your work area tidy.
- Why it works: Adds storage space without altering the room or blocking pathways.
- Pathway check: Make sure racks don’t scrape walls or hit furniture when doors open.
- Pick sizes wisely: Match pocket depth and rack width to what you store—sprays need deep pockets, notebooks need flat shelves, cords fit small bins.
Turn cabinet doors and inside-cabinet space into storage zones
Make the inside of your cabinets work harder by turning doors and deep shelves into active zones. Small upgrades stop small items from disappearing in the back.
Door-mounted racks for small items you use often
Attach slim racks on the inside of a cabinet door for tape, sticky notes, batteries, and adapters. These racks keep frequently used items visible and easy to grab.
Pull-out drawers and slide-out shelves to access deep storage space
Install pull-out drawers or slide-out shelves so the back of a cabinet is no longer a blind spot. They bring heavy or stacked boxes forward and cut down on digging.
Vertical bins and dividers for files, notebooks, and trays
Use vertical bins and dividers to store notebooks, file folders, and trays upright. This protects papers and uses cabinet height efficiently.
- Practical tip: Measure clearance before you buy—make sure add-ons don’t block shelf edges or stop doors from closing.
- Small gains: Even a single inch inside a cabinet can become useful storage when planned well.
Tall cabinetry and wall-to-ceiling shelving to use every inch
When you extend shelving up to the ceiling, you capture space normal furniture misses and create a strong room anchor.
Tall cabinets and bookshelves make the most of every inch in a small home office. They free floor area and keep work zones clear.
Adjustable shelving to match changing needs
Choose adjustable shelves so you can swap heights as your items change. One season you may need more file space; the next you’ll fit cameras or boxes.
Closed-door cabinets for a clean, streamlined look
Closed cabinets hide clutter and give the room a calm, professional feel. Use them for paper, chargers, and noisy gear you don’t want visible.
Open shelving to balance storage with office decor
Open shelves let you mix books, framed photos, and labeled bins for a lived-in but tidy look. Combine open and closed units for both function and decor.
- Home office ideas: tall cabinet for paper and a printer, shelves for books and framed items, labeled containers for supplies.
- Closet-office tip: use floor-to-ceiling shelving to reduce floor crowding and make the small room feel organized.
- Placement tip: keep heavier items low to lower tip risk and place lighter, rarely used boxes higher up.
Ceiling and high-wall options for rarely used items
Tall rooms offer a secret: overhead racks and high shelves that free your desk from long-term clutter. If your ceiling is high, move rarely used boxes and seasonal gear up and out of daily sight. This protects your main workspace and keeps surfaces clear.
Hanging racks for high ceilings and modern, chic storage
Hanging racks fasten to the ceiling to create an airy, modern look while adding real shelf space for lightweight bins or equipment cases. They work best for items you don’t need weekly, like backup cables or spare camera gear.
High shelves for archive boxes and seasonal supplies
Install high shelves near the ceiling to hold archive boxes, seasonal supplies, and backup paper. Keep heavier boxes low and label everything so you don’t pull down the wrong bin repeatedly.
- Protect daily areas: Move rarely used items upward so your desk and floor stay clear.
- Access tools: Use a stable step stool or small ladder and firm labels for safer retrieval.
- Safety check: Confirm the ceiling structure, use proper mounts, and keep loads light to maximize vertical use without risk.
- Home office benefit: A clear desk improves focus and makes the room easier to maintain.
Micro-storage upgrades for small office supplies
A few compact organizers will multiply the usefulness of the shelves you already own. These micro-upgrades keep tiny items from spreading across your desk and make supplies easier to find.
Stacking drawers and stackable containers
Stacking drawers and stackable bins multiply shelf capacity without adding bulk. Use clear drawers so you can see pens, clips, and adhesives at a glance.
Group like items by drawer to avoid rummaging. Stack low on open shelves and label each unit for speed.
Repurposed spice racks for pens and small tools
Grab a narrow spice rack from the kitchen aisle and mount it near your desk to hold markers, rulers, and small tools. These racks are shallow and perfect for easy access.
They save desktop space and keep the items you use often within arm’s reach.
Magazine racks for notebooks and mail
Magazine holders display notebooks, mail, and paper pads upright so piles don’t form. Slim racks make it simple to pull the next notebook without disturbing the stack.
- Best way to choose: pick transparent or labeled bins, match sizes for a neat look, and favor uniform colors to reduce visual clutter.
- Mount micro-storage near task zones—shipping, note-taking, or sketching—to cut unnecessary steps.
- Small changes build momentum: these upgrades are cheap, renter-friendly, and don’t require a remodel.
Wall storage setups by office area
Match each wall in your office to a clear role so clutter finds a home instead of drifting onto surfaces. Below are three copy-and-paste layouts you can apply right away, plus simple rules to keep each zone tidy.
Entry-style drop zone
Create a small shelf with a row of hooks underneath for keys, coats, and daily carry items. Add two shallow baskets below the shelf for mail and quick grab supplies.
Rule: limit each basket to one category—incoming mail in one, chargers and receipts in the other—to stop overflow.
Workstation setup
Mount a pair of shelves above the monitor line so your sightline stays clean and essentials stay reachable. Keep frequently used items on the lower shelf and decor or reference bins higher.
Tip: use matching baskets on the shelves to hide small supplies and maintain a calm room feel.
Closet-office shelving system
Fit adjustable shelving into the closet to maximize vertical space and convert a tight nook into high-capacity storage. Use labeled bins and one row of hooks on the inside door for bags or headphones.
Scale this setup: start with three shelves and add more as your needs grow. Consistent containers make expansion neat and predictable.
- Quick rules: one category per basket, heavier items low, and keep daily items within arm’s reach.
- These practical layouts act as flexible storage solutions you can build on over time.
How to install vertical storage solutions safely and securely
Start installations with safety in mind so every shelf and rack becomes a reliable part of your workspace. Proper mounting protects the floor, prevents damage to equipment, and keeps people safe.
Anchor heavy shelves to studs or sturdy supports
Always fasten heavy shelves into studs when you can. For drywall-only areas, pick anchors rated for the load and avoid relying on drywall alone for heavy items.
Follow manufacturer instructions and weight limits
Read the product manual and respect weight ratings for metal rails, cabinets, and organizers. Overloading leads to failure, wasted space, and costly repairs.
Inspect mounted organizers regularly for stability
Set a simple routine: once a month check for wobble, loose screws, or sagging. Tighten fasteners and replace worn anchors immediately.
- Tools to have: stud finder, level, correct drill bits, and a torque-rated driver bit to seat fasteners properly.
- When to avoid drywall-only mounting: heavy items, printers, or full cabinets—use studs or toggle bolts instead.
- Why it matters: secure installation keeps items accessible and makes the best use of wall space without creating hazards.
Conclusion
Close by picking one spot to upgrade so your work area feels calmer and more useful. Start with the desk wall or the back of a door and notice how reclaiming a bit of space changes the whole room.
Sort items by how often you use them, set clear zones, and protect walkways so the system stays practical. Good planning keeps your vertical storage functional and safe while using vertical ideas that match your routine.
Remember the best storage solutions from this guide: shelves, fold-away furniture, pegboards, hooks and rails, door organizers, cabinet upgrades, tall shelving, and ceiling/high-high options. Move rarely used boxes up and label everything so you use every inch well.
Safety tip: anchor into studs, respect weight limits, and check mounts regularly. A quick weekly reset keeps these storage solutions tidy and makes daily work easier.