Placing a floating shelf layout above your desk can transform tight spaces into smart storage and style zones. You’ll learn why weight distribution and placement matter more in a work area than in a decorative wall, and how to plan so your setup stays safe and useful.
This short guide previews what you will do: plan the wall, choose materials and hardware, space the shelves, and arrange items to keep them stable over time. Think of it as a practical checklist that helps you avoid common mistakes like overloading one side or mounting too low above a monitor.
Key rules you’ll use: spread heavy items across the span, anchor into studs when possible, and keep negative space so the wall does not feel crowded. The advice fits home offices, apartment nooks, and small rooms across the United States.
Why floating shelves work so well above your desk
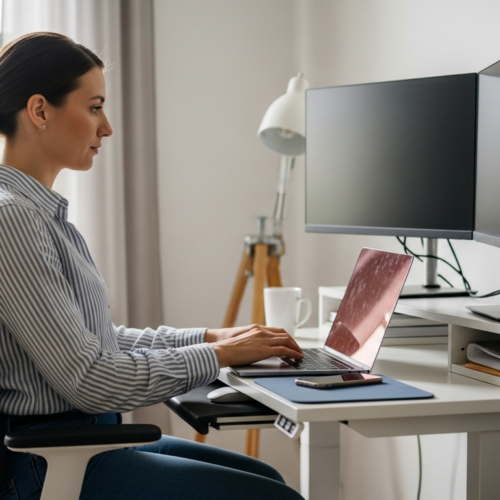
When you move everyday items up the wall, your desktop stays clear and your tools stay within reach. That simple shift creates more usable space and a neater zone for focused work.

Space-saving storage that keeps your work surface clear
Putting papers, reference books, and bins on wall units reclaims floor and desk area. You can store essentials vertically so your monitor and keyboard sit on an uncluttered surface.
Open shelving that adds style and visual interest
Open units show off color, texture, and structure without heavy hardware getting in the way. The hidden-bracket look makes the wall feel lighter and lets the display read as design, not just storage.
Flexible options for small rooms, nooks, and tight areas
You can choose a single long board, stacked units, or a slim side run to match your room’s limits. Keep daily items within arm’s reach and leave empty spaces so the area doesn’t feel crowded.
- Tip: Arrange frequently used items lower and decorative pieces higher to avoid clutter.
- Tip: Mix closed containers with open pieces to balance function and style.
- Tip: Anchor into studs when possible to maximize load safety.
How to plan a Floating shelf layout over a desk wall
Measure carefully: the right dimensions keep your wall units useful, safe, and balanced.
Start by measuring the full desk zone. Note desk width, the wall space beyond desk edges, and usable heights above monitors and lights. Mark these on a paper sketch so you see real limits before buying anything.

Decide what you’ll store versus display
List the items you need nearby and those that are decorative. Choose deeper shelving for bins and slimmer boards for framed pieces. This keeps functional storage from crowding your display zones.
Choose a focal point to anchor the design
Pick one strong object — a print, plant, or art piece — and center other pieces around it. A clear focal point reduces visual chaos and helps the whole wall read as a single design.
Leave intentional negative space
Keep breathing room between groups so frequently used objects are easy to spot and grab. Use painter’s tape to preview heights and lengths, and map studs before you drill.
- Sketch shelf lengths and positions.
- Mark proposed heights with tape to check clearance.
- Map studs to plan secure support.
Wall readiness and prep before you hang shelves
Prep work on the wall sets the stage for a clean, durable installation that holds up in a busy office area.
Patch, paint, and clean so the wall looks finished behind shelving
Why prep matters: once shelves are mounted, it’s hard to reach behind them. In a high-use area you’ll avoid extra repairs and messy touch-ups later.
Quick steps you can take now:
- Fill nail holes and sand rough spots.
- Wipe dust and grease from the wall so paint adheres.
- Touch up or repaint visible zones, but plan locations first so you don’t paint under covered areas.
Identify tricky surfaces and plan the right way to fasten
Tile, brick, and uneven plaster need special hardware. These walls may require masonry anchors, toggle bolts, or a rail system.
If your wall is textured or bowed, you may need shims or a different system to keep shelves level and secure. Clean, even walls make the final installation look intentional rather than like an afterthought in your work area.
Weight capacity basics you should know before loading shelves
A rated capacity on a product label is only half the story—your wall and fasteners finish the equation. Real-world capacity blends the board strength, the hardware, and where you anchor it into the wall.
Stud support and real-world load guidance for floating shelf brackets
Use the practical stud rule: plan on about 50 pounds per stud. If your support spans two studs, expect roughly 100 pounds when anchors and fasteners are correct.
Why high-quality hardware and sturdy materials matter
Hidden supports rely on excellent fittings. Cheap anchors or thin metal can loosen over time. Thicker wood boards and well-made metal supports resist sag and give you more usable capacity.
What makes shelves feel unstable over time
- Missed studs or weak anchors.
- Loose fasteners from repetitive use.
- Heavy items placed at ends instead of near supports.
- Thin, low-density boards that sag under constant load.
Match your options to the load: pick lightweight displays for thin boards, choose durable materials and brackets for heavy books or bins, and always spread weight across the span for best long-term stability.
Weight distribution rules for office shelving above desks
How you place heavy items makes a big difference to shelf strength and daily use. Follow a few simple rules to keep your work area safe and organized.
Spread heavy items across the shelf
Don’t stack all heavy books or bins in one tight spot. Spread weight along the full shelf length so no single point bears stress.
Place the heaviest items near supports
Mount heavier books, storage bins, and essentials closest to the brackets or studs. That zone is the strongest and reduces sag over time.
Balance physical and visual weight
If one side holds dense books, offset it on the other side with a plant, a basket, or lighter items. This keeps the shelf stable and improves visual interest.
Plan for daily use and shifting loads
Think about dynamic weight: grabbing supplies, pulling a notebook, or moving a bin stresses predictable spots. Place frequently used essentials where reach is easy and supports are strong.
- Example: split books into two small stacks rather than one large pile.
- Example: center heavy bins over studs; keep daily essentials within arm’s reach.
- Outcome: stable shelves reduce distractions and protect your desk from falls.
Finding the right shelf placement above your desk
Think of the wall above your desk as a set of reach zones: public display up high, daily tools within arm’s reach. This approach keeps the area usable and helps you avoid a crowded feel.
Clearance for monitors, task lighting, and your seated line of sight
Measure from your seated eye level to the wall and note the top of your monitor and any adjustable lamp arms. Place the lowest shelf high enough to clear these points so screens and lights aren’t blocked.
Ergonomic reach zones for everyday office essentials
Keep daily items close: pens, a planner, and a headset should sit within easy reach. Store rarely used boxes or decor higher so the prime space stays free for what you use most.
How to avoid head bumps and “crowded wall” syndrome
Prevent head bumps by testing both seated and standing positions; raise the lowest shelf if you lean forward. Avoid crowded wall syndrome by leaving open wall space around groups and resisting the urge to fill every gap.
- Use painter’s tape mockups to confirm clearance before drilling.
- Center heavy items over supports and keep open zones visible.
- Good placement boosts comfort and keeps your workflow steady.
Spacing between floating shelves for accessibility and a spacious feel
Good spacing makes your wall feel airy and keeps daily items easy to reach. Use spacing to balance function and the visual calm of your work zone.
Standard baseline: aim for about 12 inches between shelves for general usability and balanced proportions. This distance fits most books, small bins, and framed photos while keeping the area compact.
When to increase spacing
Increase gaps to 18–24 inches when you want easier access, a more open look, or room for taller items. Wider spacing reduces accidental bumps and makes lifting objects safer.
Spacing for tall decor, framed photos, and plants
Measure the tallest item you plan to display—tall decor, framed photos, or plants—and build spacing around it, not the other way around. Allow extra room for plant growth and frames that sit on small easels.
- Visual calm: more space between shelves makes a small office feel less crowded.
- Practical access: wider gaps let you remove items without scraping knuckles or tipping photos.
- Lighting: consider under-shelf lights and desk lamps; shelves too close can cast unwanted shadows.
Choosing materials and shelf thickness for strength and style
Material choice dictates both how much weight a board can hold and how your room feels. Pick options that match how you work and the visual tone you want above your desk.
Wood shelves for warmth and a classic home office look
Wood remains a top pick because it adds warmth and pairs well with common desk finishes. Thicker boards resist sag and hold books and bins better over time.
Metal and mixed materials for modern, minimalist rooms
Metal and mixed materials give a crisp, modern look with slim profiles. They need strong internal supports, so choose thicker gauge metal or reinforced cores for heavier loads.
Acrylic shelves to reduce visual clutter and highlight books
Acrylic shelves minimize visual clutter and can make your books look suspended. They suit small rooms that need a lighter, airier feel but still require proper anchoring for weight.
Live edge wood for organic character and unique shelf ideas
Live edge wood offers one-of-a-kind character and texture. It reads as art and storage, but like other wood options, thickness and mounting determine long-term stability.
- Compare materials by thickness, build quality, and sag resistance.
- Match finishes to your desk and hardware for cohesive style.
- Pick shelf ideas that balance function and the overall room look.
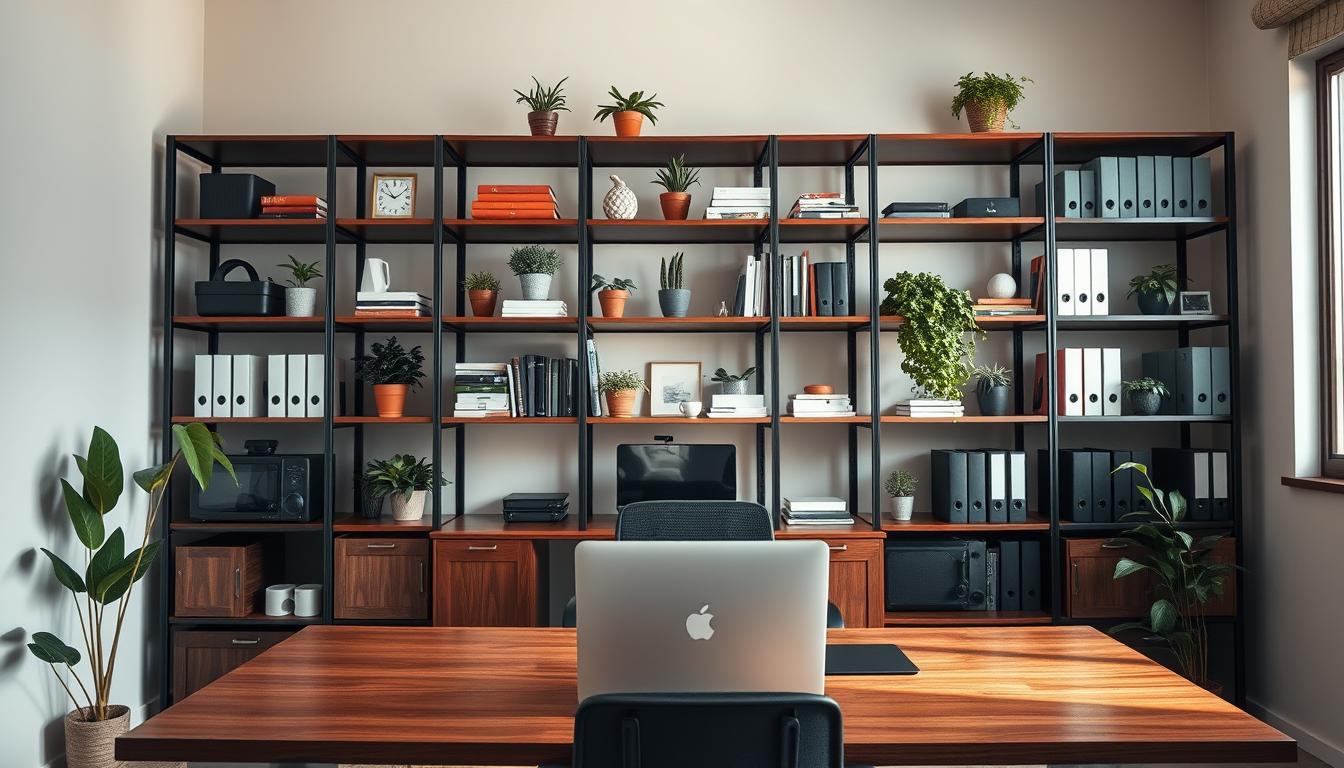
Layout ideas that work especially well above desks
Try a few proven arrangements to make the wall above your desk work harder without feeling crowded. Below are practical designs that match different wall widths, storage needs, and the amount of open space you want to keep.
Vertical stacks for narrow walls
Use stacked units when width is tight. Vertical shelving draws the eye up and increases capacity without widening the footprint.
Staggered shelves for a modern feel
Place boards at varied heights to add movement and visual interest. This approach keeps the desk zone functional while creating a lively, contemporary design.
Symmetrical grids for calm workspaces
Align equal-size boxes in a grid for a neat, focused backdrop. Consistent spacing reduces visual noise and helps you find items quickly.
Layered shelves to add depth
Combine a longer shelf below with narrower pieces above to create depth and a cozy look. Leave room for a central art piece or plant as a focal point.
Desk-nook side shelving for reachability
Install narrow units to one side of the desk to keep daily supplies within arm’s reach. This keeps clutter off the main wall above your monitor and improves workflow.
- Tip: Match the pattern to wall width and how often you access items.
- Tip: Borrow ideas from living room walls but scale them for desk use.
- Tip: Test mockups with tape before you drill.
Corner and nook solutions for awkward office areas
Awkward nooks can become smart storage spots with a few simple adjustments. Corners and recesses often go unused because standard furniture won’t fit. With the right approach, you can turn those areas into functional, attractive zones that free your desk.
Corner options that maximize overlooked space
Use a single corner shelf for a plant or daily supplies to keep the spot light and useful. For more capacity, stack several narrow units into a corner run. This adds storage without bulk and keeps the room feeling open.
Nook solutions that work as mini libraries or displays
Shallow shelving in a nook makes an ideal mini library or display area. Fit boards to the recess depth and keep heavier items near supports. This creates a cozy spot for reference materials and decor without crowding the main work area.
- Avoid cramped looks: use lighter finishes and leave negative space around groups.
- Workflow tip: place the best spot within easy reach so you don’t twist or stand up often.
- Seamless style: match finishes to nearby living areas in open-plan rooms so the corner blends in.
Design details that boost function and reduce accidents
A few well-chosen details will keep things from sliding off and improve how your workspace reads.
Shelf rails add safety and a design accent
Rail trim—from thin brass to painted metal—stops items from slipping, which matters when shelves sit above a desk. Rails also give a deliberate color and hardware cue that ties into drawer pulls and lamp finishes.
Under-shelf lighting for task visibility and mood
Under-shelf lights improve visibility for your work and highlight decor. Choose battery-operated LED strips for easy DIY installs or run a wired system for a cleaner look and stronger illumination.
Mini cabinets paired with open shelves for hidden storage
Pairing small cabinets with open boards solves the open-storage problem: you can display a few styled items and hide clutter behind doors. The combo reduces dust on frequently used supplies and lowers upkeep over time.
- Kitchen-inspired idea: rails corral dishes; use the same approach to secure office items and framed pieces.
- Safety payoff: fewer falls, better light, and less cleaning.
- Style tip: repeat one color across rails, knobs, and lights to unify the look.
Styling your shelves without sacrificing a productive workspace
A thoughtful arrangement can make your work wall look curated without stealing focus from your tasks. Keep styling simple so the area helps you work, not distract you.
Mix textures for depth
Combine wood, glass, ceramics, and woven pieces to add interest with few items. A wooden box, a glass vase, and a woven basket create contrast and tactility.
Group in odd numbers and layer heights
Arrange items in 3s or 5s to form natural groupings. Layer heights with a small stack of books, a riser, and one taller decor piece to add dimension without clutter.
Keep a narrow color palette
Use 2–3 neutrals and 1–2 accent colors so your eyes rest while you work. Consistent color keeps the room calm and makes important objects easier to find.
Add living touches
Include one small plant or a clear glass vessel to add softness and a living feel. Balance does not require symmetry—negative space matters.
- Quick guide: mix textures, use odd-number groupings, layer heights, and limit color for a focused style.
What to put on shelves above a desk for everyday usefulness
A well-curated wall above your desk should serve routine work without adding visual noise. Start by prioritizing items that you reach for daily. Keep decorative pieces few and meaningful so the area feels useful, not crowded.
Office essentials that belong within reach
Place pens, notepads, a charging dock, printer paper, and small labeled containers on the lower row. These keep your workflow smooth and reduce trips away from the desk.
Books and notebooks that won’t overwhelm the shelf space
Limit books to curated stacks and split heavy volumes into multiple groups. Avoid turning the wall into a full library; reserve denser storage for a cabinet or bookcase.
Photos, art, and decor pieces that personalize without distracting
Choose a few favorite photos or prints and keep frames consistent for a tidy look. Place the most important photo near eye level and rotate art seasonally to keep the display fresh.
- Edit test: if you can’t dust around it or grab it with one hand, remove items.
- Prioritize routine tools (timer, reference binder) over purely decorative pieces.
- Maintain negative space so your desk area stays calm and focused.
Common disadvantages of floating shelves and how you can avoid them
What begins as a curated display can slip into clutter if you treat every surface like a temporary landing spot. Open boards invite quick drop-offs, and before you know it the area above your desk feels crowded and distracting.
How shelves get cluttered quickly and what to do instead
The biggest downside: open storage makes it easy to set things down “just for now” and never edit. To prevent this, limit each board to two or three functional zones.
Use matching bins and a consistent color palette to hide small items and reduce visual noise. Keep one segment empty as a reset space so your wall can breathe.
Cleaning and upkeep tips for open shelving
Open units collect dust faster than closed furniture. Choose wipeable finishes and leave gaps between objects so you can clean quickly.
Schedule a short monthly tidy: remove everything, dust, and replace only what fits the plan. That small habit keeps the surface looking intentional.
When floating shelves aren’t the best storage option
If you need to hide paperwork, store mismatched supplies, or secure sensitive belongings, open boards are not ideal. In those cases, combine display with closed options.
- Pair open runs with a mini cabinet or a low drawer unit for concealed storage.
- Choose fewer, better-placed boards rather than adding more pieces that shrink visual space.
- Use closed boxes on lower levels for heavy or private items and open space above for curated accents.
Outcome: by editing regularly and adding a bit of closed storage, you keep a stylish wall that supports real work without creating extra chores.
How to tie desk shelving into the rest of your home
Make your desk wall feel like part of the house by repeating finishes, hardware colors, and materials from nearby rooms. This simple move helps your workspace read as intentional and not an afterthought.
Borrow kitchen styling for lighter office items
Use the same logic kitchens use for dishes: group like items, repeat shapes, and keep things reachable. Apply that to trays, catchalls, and small bins so daily tools stay tidy and accessible.
Living room-inspired statement walls
Bring living room ideas to your desk by creating a focused backdrop. A coordinated run of boards can act like a media wall and make your workspace a design feature in the home.
Bathroom-style vertical storage for small spaces
Think vertical like a bathroom: stack narrow units to save floor space. Tall, slim runs work well in tight nooks and give you efficient, easy access to supplies.
Entryway tricks for keys and mail
Add one low zone for grab-and-go items if your desk sits near the door. A small catch spot keeps keys, mail, and chargers organized so your daily exits are smoother.
Takeaway: when you borrow ideas from the kitchen, living room, bathroom, and entryway, your shelves provide consistent function and style across the home. Keep items edited and accessible for the best results.
Conclusion
Close this project by testing one strong run and adjusting for real-world use.
Measure your wall, list what you’ll store and display, and pick a floating run that fits your desk. Anchor into studs when possible, use quality hardware, and spread heavy items so weight is balanced.
Keep spacing around 12 inches for most items, or 18–24 inches for a more open feel. Maintain a calm look with a simple palette, negative space, and a few plants or photos for personality.
Start small: install one set of shelves, use it for a week, then tweak positions and styling based on how you actually reach for things.