You can turn an underused corner into a focused workspace that feels both sheltering and practical. OSHA warns that awkward postures and long static positions raise the risk of musculoskeletal disorders (MSDs). This makes smart setup choices essential if you spend hours at a desk in your home.
The right placement in a room helps you see the door and reduces distraction. Avoid making the deep corner your command center; that often forces twisted necks and rounded shoulders. Instead, aim for neutral alignment and regular movement.
In this guide you’ll get a clear, step-by-step approach: pick the best spot, set chair and desk height, zone your surface, and position your monitor. You’ll also learn how lighting, storage, and cable management affect comfort, safety, and daily productivity.
– Learn to convert a dead zone into a safe, productive workspace.
– Focus on neutral posture plus movement, not one fixed position.
– Small layout, lighting, and storage changes cut strain and boost focus.
Choose the right corner desk spot to boost focus in your room
Find a tucked-away spot that turns unused floor into a focused work area without cutting off walkways. A typical unused corner can free up roughly 9–16 square feet of usable space, so this choice matters more than it looks.

Turn an unused corner into usable workspace without blocking traffic flow
Walk your room and mark a dead zone you rarely use. Confirm the placement won’t interfere with door swings or main paths.
Use “sheltered” sightlines to stay focused while still seeing the room entrance
Place the setup so you can see the doorway without sitting in the middle of traffic. This gives a sheltered feel and helps reduce interruptions.
Measure wall lengths, door swings, vents, and outlet access before you commit
- Measure both walls to ensure the footprint fits; a 3-inch clearance helps chair movement.
- Check baseboards, vents, and outlet access so power and data reach without unsafe extensions.
- Decide if a corner l-shaped desk or a smaller l-shaped desk is the right solution for your home office.
Quick placement checklist: measure walls, confirm door swing, note vents and outlets, add 3″ clearance, and plan cable routes before assembly.
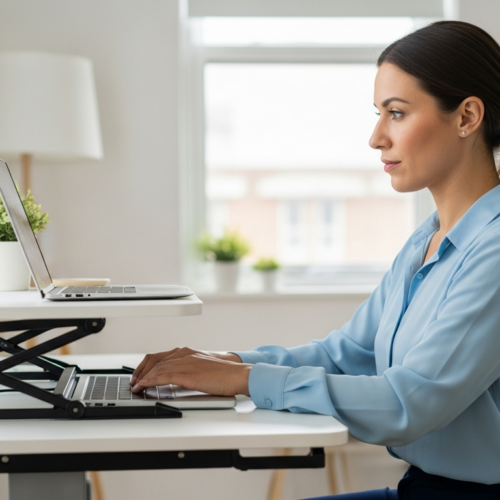
Corner desk ergonomics starts with chair setup and desk height
Start by setting up your chair so your body sits in a neutral, stable base before you touch the work surface. OSHA guidance stresses adjusting seating first to establish a safe posture that cuts down on long-term strain.

Set your chair first
Raise or lower the seat until your feet rest flat and your thighs sit nearly parallel to the floor. Aim for knees at or slightly below hip level so the pelvis and back align naturally.
Use lumbar support and armrest tuning
Sit back into lumbar padding to keep the spine’s curve. Adjust armrests so shoulders relax; your elbows should land near a 90–110° bend without lifting the shoulders.
Match the work surface height to your body
Set the surface at just-below-elbow height so forearms stay level while typing and your wrists stay neutral. If the table won’t adjust, use a footrest, a keyboard tray, or small, safe risers.
- You’ll start with the chair: it anchors posture before the surface.
- Feet flat and stable: help leg and pelvis alignment.
- Practical fixes: footrest, tray, or modest height changes when needed.
Stop using the corner as your primary work area
Placing your main input zone deep in the room’s apex often feels natural but can cause real body stress over time.
The “corner command center” myth hides a simple mechanical problem: a 90-degree apex pushes your keyboard and mouse into an angled reach. That geometry creates ulnar deviation (outward wrist angle) and uneven shoulder loading. Over weeks and months, this pattern raises the risk of repetitive strain and discomfort.
Why the deep apex hurts wrists and shoulders
When you type or use a mouse at the angled point, your arms flare and wrists bend. This forces one side of your body to work harder.
Small repeated stresses add up into persistent pain and lowered focus over time.
What belongs in the apex instead
- Reserve the point for passive items: a lamp, speakers, or a plant that you don’t handle constantly.
- Keep active tools on a straight edge: place keyboard and mouse where you can sit square and keep shoulders symmetrical.
- Use this rule as your solution: zone the area so frequent reaches stay short and balanced.
Switching the position of your input tools is a quick, high-impact fix. It reduces repetitive stress and helps the rest of your setup—monitor placement, reach zones, and storage—work together for better comfort.
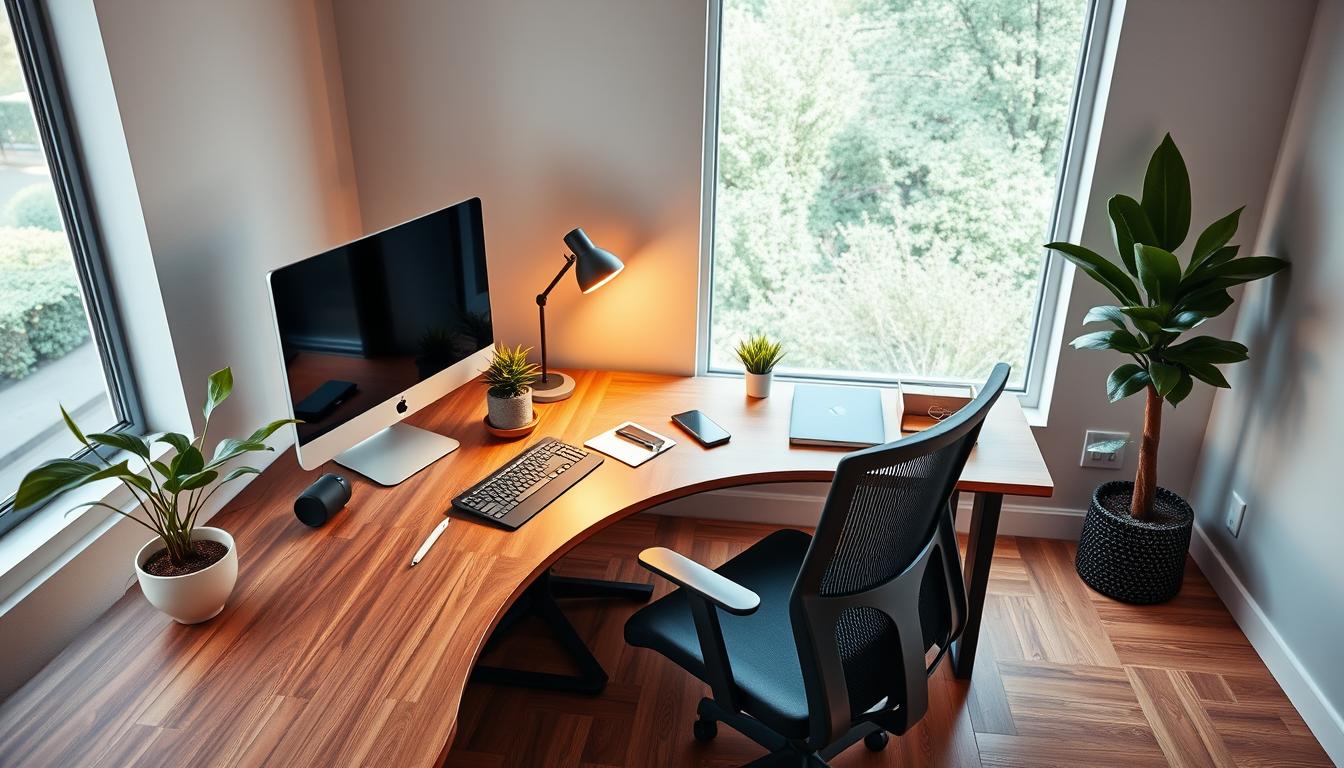
Zone an L-shaped or corner L-shaped desk for smoother workflow
Divide your L-shaped workspace into two purpose-driven wings so you minimize twisting and keep your body aligned. Set a primary wing where your keyboard, mouse, and main screen sit directly front. This helps you face tasks squarely and reduces neck and shoulder strain.
Primary wing: center your core work
Place the monitor and keyboard on the straight edge so your arms stay neutral. Position the screen at eye level and the keyboard so your forearms are parallel to the floor.
Secondary wing: reference and overflow
Use the secondary wing for paperwork, a laptop, or reference items you only glance at. Angle this area for quick pivots, not long reaches, which lowers arm and neck strain.
- Two wings, two jobs: primary for active tasks, secondary for support.
- Easy reach zone: keep daily-use items within arm’s length to cut repeated lifts.
- Choose the best wing: base the primary side on lighting, outlet access, and whether you need extension space for documents.
Apply these rules to small setups and larger workspaces alike. A simple map—monitor and input directly front, references to the side, and daily items inside easy reach—keeps your workflow smooth even on busy days.
Position monitors at eye level and an arm length away to reduce neck and eye strain
Set your primary display where you naturally face forward so your head and neck stay neutral. This simple position lowers repetitive turning and helps sustain focus.
Place the main monitor and set height
Put the main monitor directly front of you with the top third at or just below eye level. That keeps your gaze slightly downward and reduces neck flexion.
Dial in viewing distance
Measure an arm length away (about 50–70 cm) as a starting point. Then fine-tune for text size and comfort until your eyes feel relaxed.
Dual monitors and alignment
Angle additional monitors inward about 15–30° to form a gentle curve. Align heights so your eyes don’t move up and down between screens.
- Place the monitor directly front so you sit square, not twisted.
- Keep the keyboard and mouse on the straight edge to prevent flared arms.
- Use consistent screen heights and arm length checks for repeatable setup across devices.
Protect comfort and productivity with movement, lighting, and smart storage
Comfort is dynamic, not fixed. Holding one posture for long periods restricts blood flow and raises fatigue. ISO 11226:2000 flags the risks of sustained static postures, so plan movement into your day.
Avoid static loading: change posture often instead of chasing one “perfect” position
Even the best setup will fail if you sit in the same position for hours. Shift every 30 minutes and use brief walks to reset muscles and circulation. This simple habit reduces cumulative strain and keeps you alert.
Try a practical sit-stand rhythm inspired by the 20-8-2 approach
Use the Cornell-inspired 20-8-2 pattern: sit 20 minutes, stand 8, and move 2 per 30. Over a workday this gives you built-in micro-breaks that protect focus and reduce aches.
Light a darker corner and use smart storage to clear the space
Layer task lighting with soft ambient light to cut high-contrast glare and ease your eyes. Add vertical shelving and under-desk storage so daily tools stay accessible without cluttering the primary work surface.
- Quick win: schedule movement prompts by time, not willpower.
- Lighting: balanced light reduces eye fatigue over long hours.
- Storage: vertical shelves + drawers keep your home workspace tidy and focused.
Keep your setup safe and clean with cable management and stability checks
Treat cable routing and weight checks as a safety step, not just a tidy-up task. Good cable management reduces trips, prevents sudden disconnects, and protects gear during sit-stand moves.
Create a service loop of about 30–50 cm (12–20 in) of slack for power and data cords so they won’t snag when you raise or lower a desk. That small allowance stops abrupt pulls that can drop monitors or unplug drives.
Route cords for safety and easy cleaning
Use trays, sleeves, and ties to keep cables off the floor and out of walkways. Secure bundles under the work surface, and label power runs so you can unplug or trace connections quickly.
Confirm load capacity and test stability
Make sure your desks list a rated capacity at least 20% higher than the combined weight of monitors and peripherals. After setup, apply a light lateral force (about 5–10 kg) to check for wobble.
- Service loop: leave 30–50 cm slack for sit-stand travel.
- Routing: trays, sleeves, and ties keep floors clear and reduce trip hazards.
- Stability: pick a frame rated above your gear weight and do a quick wobble test.
- Monitor mounts: confirm screws and VESA brackets are tight before daily use.
- Troubleshooting tip: if product manuals open in-browser and you see messages like “page blocked” or “blocked extension,” try disabling extensions so setup guides load when you need them.
You’ll build a safer workstation by treating cable management as part of comfort and equipment protection. A clean, stable setup lasts longer and keeps your focus on work, not on tangles or unexpected disconnects.
Conclusion
Close the loop on setup with a quick checklist that guards posture and reduces daily strain.
Position your desk in the chosen corner so your workspace supports focus and long‑term joint health. Start with the chair, match desk height to elbow level, then place the monitor directly front and set it at eye level.
Remember the single biggest rule for L‑shaped layouts: avoid working from the apex. Keep active input on a straight edge and use the angled wing for references or overflow.
Quick checklist: monitor center, move every 30 minutes, secure cables, and use vertical storage to clear the surface. Reassess your setup as tasks and devices change so your home office stays comfortable and productive.