Stacks of paper cost more than clutter. When boxes and filing cabinets hold your records, you pay in square footage, rent, and wasted time finding what you need.
Turning to a practical paperless workflow setup means converting paper into searchable data, standardizing how you handle documents, and training yourself to retrieve by search first. This approach makes a clear, repeatable system for document management.
This guide walks the end-to-end path: planning a system, installing Paperless-ngx on a server, configuring directories, enabling OCR, and automating ingestion. You’ll get step-by-step instructions to keep access and security under control.
The payoff goes beyond tidiness: faster search, cleaner collaboration, simpler sharing, and fewer “where did I put that document” moments. You’ll also set up web UI, consumer, OCR, email intake, and tags/metadata so files stay usable at home, in the office, and on the web.
Why Going Paperless Frees Up Physical Square Footage in Your Office
Filing cabinets and banker boxes quietly consume valuable office real estate and add hidden costs.
Large rows of folders, stacked banker boxes, and dedicated archive rooms all take up rentable square footage. Each cabinet or box translates to months or years of rent, plus the floor space you lose for desks and collaboration areas. Temporary piles often become permanent storage and hide important files.
Where space disappears:
- Filing cabinets and archive rooms that sit unused most of the day.
- Banker boxes stacked in closets or under desks.
- “Temporary” folders that grow into long-term storage needs.
Turning physical documents into searchable data changes the case entirely. With OCR’d text and consistent metadata, you can query the content of a document in seconds instead of rifling through folders. Tags and a search-first structure remove the need for deep folder trees and reduce time spent locating a file.

Business outcome: less space used, faster decisions, and lower risk of loss — benefits you’ll realize as you follow the technical steps later in this guide.
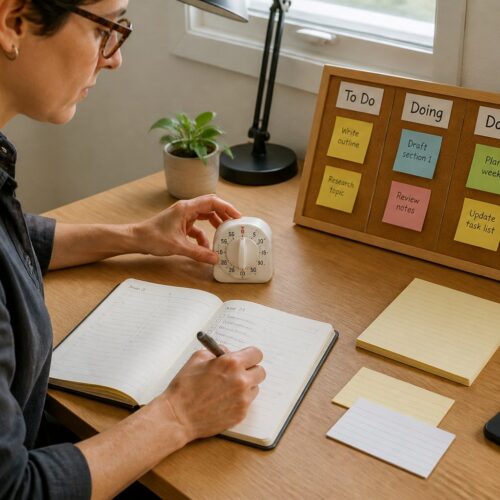
Plan Your Paperless System Before You Scan a Single Document
Before you scan a single page, decide where the definitive copy of each document will live. A clear source of truth stops duplicate versions and saves time when you search for a file later.
Pick a source of truth for files and versions
Choose one place that controls final versions—your server or a trusted shared drive. Paperless-ngx runs a consumer that watches an intake folder and a web server that becomes the UI and catalog.
Why this matters: it keeps email, desktops, and mobile apps from creating conflicting copies.
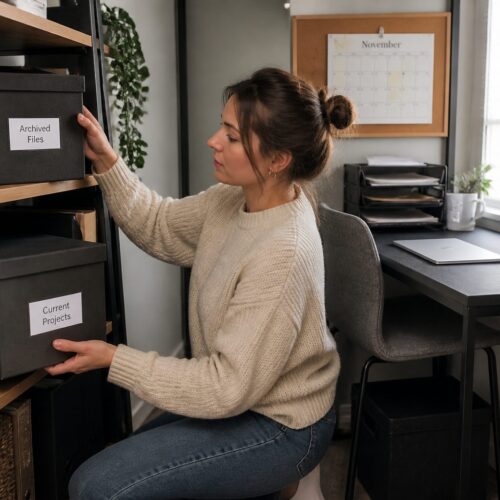
Define a default structure: inbox, archive, storage
Use three simple paths: an inbox/consume directory for new scans, an archive destination for processed documents, and long-term storage for retention cases.
- Inbox (consume): short-term holding area for new files.
- Archive: searchable, indexed files with metadata.
- Long-term storage: cold storage for aged records.
Decide how you’ll access documents at home, in the office, and on the web
Map access needs to tech choices: a local server for office access, secure remote domain with a reverse proxy for web access, and authentication for home use.
Plan names, dates, and metadata early—correspondent, document type, created vs added date, and archive serial numbers—to avoid “final_v3” chaos and make tags the primary retrieval method.

Paperless workflow setup: Pick the Right Platform and Installation Route
Your choice of platform shapes how quickly you get searchable documents and how much maintenance you’ll face.
Four realistic routes exist so you can match effort to skill: a fast installation script, Docker Compose templates for control, a bare-metal manual install for advanced environments, or Portainer for web-driven management.
Fast start: the installation script
The install script asks configuration questions, generates files, pulls the image source/version, starts containers, and creates a superuser. Use this when you want a guided process and minimal manual work.
Docker Compose templates
Compose gives explicit control over bind mounts, container names, services, and default ports like 8000. This route suits you if you need to tweak volumes, change ports, or lock down permissions.
Bare-metal and Portainer options
Bare-metal is for advanced admins: you’ll manage Redis, Python versions, systemd services, and other dependencies by hand. Choose it only when you need that low-level control.
Portainer is the usability route: create a Stack, paste a compose file, and manage the instance through a web UI.
- Rule: pick the simplest route that meets your security, backup, and access needs.
- Docker is the recommended default — faster installs, easier maintenance, and sensible defaults.
Install Paperless-ngx on Your Server With Sensible Defaults
Getting a reliable instance running on a Linux host saves you troubleshooting time later. This section walks you through a minimal, sensible installation target so your documents begin flowing quickly.
Prerequisites that matter
Use a supported environment: a Linux server with Docker and Docker Compose installed and updated. Windows is not supported for production use.
Why Docker: it isolates services and keeps the installation consistent across servers. Bare-metal installs need specific Python and dependency versions and add complexity.
Recommended database backend
For new installs, choose PostgreSQL as the default database. PostgreSQL offers stronger concurrency, reliability, and easier scaling than file-based databases as your documents and users grow.
Quick installation process
- Pull the official images on your server.
- Bring services up with Docker Compose using sensible defaults.
- Confirm the web UI responds at http://127.0.0.1:8000.
On first access you’ll create a superuser account (or use the script prompts). Log in to confirm the instance is running and that users can authenticate.
Verification checklist:
- Services are healthy and running.
- You can log in with your new account.
- Upload a test document to confirm ingestion and OCR trigger.
Next, you’ll map persistent directories and configure volumes so your data survives restarts and upgrades.
Configure Your Folder and Directory Layout for Reliable Document Consumption
A predictable directory plan saves time when scanners, sync tools, or containers move documents. Map three persistent paths so your files survive container restarts and upgrades.
Map consume, media, and data directories
Bind mount each folder in Docker Compose, for example: ./consume:/usr/src/paperless/consume, ./media:/usr/src/paperless/media, ./data:/usr/src/paperless/data. This keeps originals and indexed storage outside ephemeral containers.
How the consumption directory works
The consume folder is an intake inbox, not long-term storage. When a document is processed, it will be removed from that folder.
Where originals live: the system writes originals and any archived PDF/A versions into the media/storage layout so you can recover files after ingestion.
Fix permissions and handle NFS
Set USERMAP_UID and USERMAP_GID so host users and the container can write to the consume folder without permission errors.
If your consume directory is on NFS (no inotify), enable polling by setting the consumer to polling (PAPERLESS_CONSUMER_POLLING) so new documents are still detected.
- Keep paths explicit and avoid ephemeral temp mounts.
- Validate read/write access before automating scanners.
- Use scan-to-folder, sync-to-folder, or bulk imports—these workflows won’t break after a reboot when directories are mapped correctly.
Turn Paper Into Searchable Text With OCR and PDF/A Archiving
Converting scans into searchable text turns months of paper into seconds of access. When you feed files into the system, an automated process decides whether OCR is needed and then indexes the result for fast lookup.
What happens during processing
The pipeline runs three steps: OCR when the incoming document lacks embedded text, indexing of extracted text, and generation of an archivable PDF/A with selectable text. This creates a durable file version you can search and share.
Set language, time zone, and performance options
Configure PAPERLESS_OCR_LANGUAGE and PAPERLESS_TIME_ZONE so OCR language detection and timestamps match your locale. These small configuration choices fix parsing differences and keep metadata consistent across users.
Optimize for low-powered hardware and skip digital duplication
On a Raspberry Pi or similar device, reduce load by limiting pages (PAPERLESS_OCR_PAGES=1) or disabling the filesystem consumer (PAPERLESS_CONSUMER_DISABLE=true). For digital PDFs that already include selectable text, use PAPERLESS_OCR_SKIP_ARCHIVE_FILE=with_text to avoid reprocessing and duplicate pdf archives.
Result: searchable text inside archived PDFs, faster search, and predictable document handling so your data stays usable whether the input was paper or a digital file.
Ingest Documents Automatically From Scanners, Web Uploads, and Email
Capture incoming documents the moment they arrive, and stop paper from piling up on desks. You can choose from three reliable intake paths to match how you work: quick uploads in the web UI, bulk drops into a consume folder, or hands-off email capture.
Drag-and-drop vs. bulk folder ingestion
The web app supports drag-and-drop anywhere in the interface. Use this for ad hoc uploads and small batches when you need fast access and immediate review.
For scanner automation and large imports, point devices or sync tools at the consume folder inside your directories. The consumer picks up files, stores them safely on the server, and then removes the originals to avoid duplication.
Email accounts and mail-rule automation
Add an email account and build mail rules to fetch matching messages. Rules can filter by folder, age, or sender, then consume attachments and apply tags or assign a correspondent automatically.
Safe post-processing: choose “mark as read” to prevent double-processing. The system also tracks processed mail, so it skips messages it already handled. Rule order matters; place specific filters first.
- Pick a path: web uploads for quick fixes, folder ingestion for bulk, email for hands-off capture.
- Auto-tagging: use rules to set tags and correspondent metadata at ingestion.
- Reduce desk clutter: automated intake keeps documents moving from paper to searchable data.
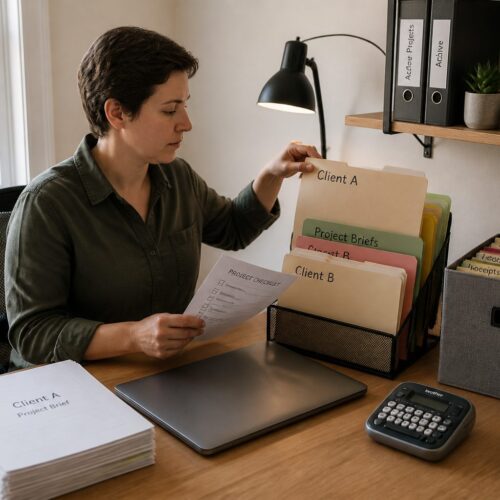
Replace Folders With Tags, Metadata, and a Search-First Filing Strategy
Think of labels, not boxes: a single document can belong to several logical buckets at once. Tags let you file by context, not by a single folder path. That reduces duplicate copies and makes retrieval fast.
Why tags beat folders
Folders force a single path. That makes management clumsy when a document fits multiple cases.
Tags let you assign multiple labels so a document appears wherever it’s relevant. Use consistent tag names and you’ll cut search time dramatically.
Nested tags and practical hierarchy
Use nested tag features (v2.19) to mimic hierarchy without locking a file into one place. Child tags auto-apply parents, and depth is limited to five levels.
This keeps structure neat while preserving multi-tag flexibility for real-world documents.
Standardize metadata for faster search
- Document type: invoice, contract, receipt.
- Correspondent: vendor or client name.
- Date fields: date created (issued) vs. date added (ingested).
- Archive serial number (ASN): physical cross-reference for storage cases.
Saved views as daily queues
- Create an Inbox saved view for new items.
- Add a “To review” filter for documents needing verification.
- Use a “Ready to archive” view for finalized items and ASN assignment.
Search-first filing ties tags, names, and dates into predictable queries. With consistent tags and metadata, you spend seconds finding documents instead of minutes hunting through folders.
Control Access, Accounts, and Sharing Without Losing Security
Clear account roles and tight access rules make your document system safer and easier to use. Define accounts and groups so you can scale beyond a single admin and reduce ad-hoc requests for files.
Users, groups, and global permissions
Create users, group them by role, and assign global permissions for areas like Documents, Tags, and Settings. This gives teams predictable rights and keeps admin work minimal.
Object-level permissions and visibility
Use owner, view-only, and edit roles for specific documents and tags. Object-level controls change what appears in the web UI and limit accidental exposure.
Safe sharing and operational hardening
Use share links with expiration and visibility rules when you must send files externally. Expiry limits long-term exposure and redirects expired links to login.
- Secure Redis and bind it to localhost or a private network.
- Configure SMTP so password reset emails work reliably.
- Encourage two-factor authentication and offer recovery codes for accounts.
Operational tip: reserve superuser access for administration. Use regular user accounts for daily management so teams adopt the system without fear of overreach.
Conclusion
Moving your records into a searchable system shrinks storage needs and speeds everyday decisions. The result is reclaimed square footage, fewer storage headaches, and faster retrieval when you need documents now.
You built a complete paperless workflow and setup: planning the system, choosing an installation route, installing on a server, and confirming the web instance responds. Keep directories and container mounts persistent so the archive survives restarts.
OCR and PDF/A protect readability and make text searchable. Use a mix of intake paths—consume folder for bulk, quick web uploads, and email rules with mark-as-read—to keep files moving off desks.
Finally, use consistent tags and metadata, right-sized user accounts, safe share links, and optional 2FA. Those choices make the system secure, maintainable, and practical at home or at work.