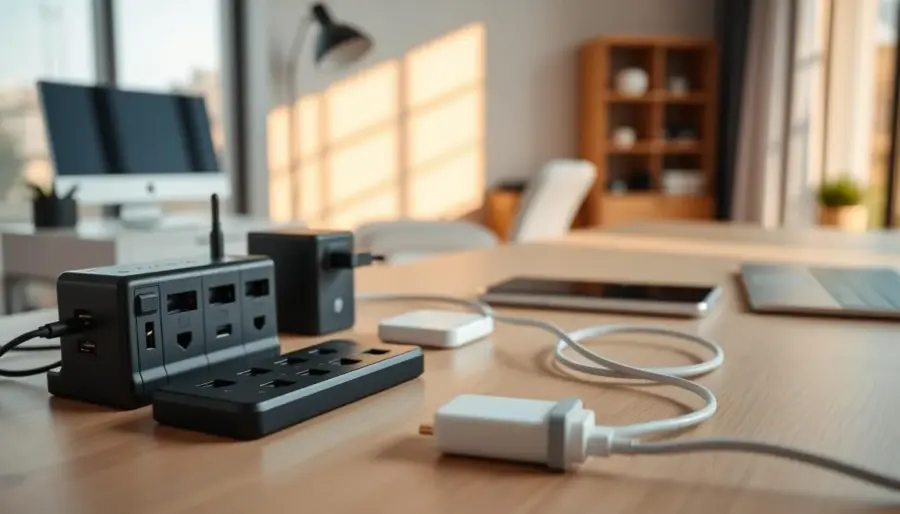
Goal: You’re building a centralized charging station on your desk that keeps power accessible while cutting cable clutter and visual noise.
When your station is visible and within reach, you plug in more often. Good lighting and easy access reduce friction and stop dead batteries from ruining a busy day.
Multiple devices and mismatched cords create wire chaos. That mess wastes time and makes your desk feel crowded.
This short guide shows what to assess, how to pick a location, which hub and ports fit your needs, and simple cable management tips. You’ll also get safety reminders so power top-ups stay worry-free.
Outcome: Expect a tidy charging zone that supports quick top-ups, smoother grab-and-go routines, and fewer mystery cords. The best solution is practical, not perfect—you’ll optimize based on how you work and the space you have today.
– Centralize power access to reduce clutter.
– Make the setup visible and reachable to increase use.
– Focus on practical, space-aware solutions for better daily routines.
Assess Your Daily Charging Needs and Desktop Space
Start by listing what you plug in every day so your desk setup matches real needs. A quick inventory stops guesses and helps you plan a practical charging station that fits your work rhythm.

List the devices you use most often
Note phones, earbuds, smartwatch, tablets, and laptops you power daily or weekly. Mark which device needs a midday top-up and which charges overnight.
Match your setup to your routines
Think about grab-and-go moments. Keep frequently used device cords reachable so you can leave for a meeting without hunting for the phone or laptop cable.
Measure the surface area you can realistically dedicate
Measure the usable area on your desk—account for monitor stands, keyboard, and writing space. Decide if one compact station or two mini areas fits your workflow.
- List devices by daily and weekly need.
- Map charge times (midday vs. overnight) to decide port counts.
- Measure usable space to avoid crowded cables and short cords.
Charging hub placement: Choose a Visible, Reachable Spot on Your Desk
Pick a clear, reachable spot on your desk so plugging in becomes a quick, no-brainer task. Visibility drives behavior: when the station sits in your line of sight, you notice low battery and act immediately.

Keep the location accessible without blocking your keyboard, mouse, or writing area. Place the main unit within arm’s reach and orient the most-used port toward your dominant hand.
Avoid tucking the unit behind monitors or under shelves. Those hidden spots often cause cable strain and make ports hard to reach, which leads to cords draped across the desk.
- Route cables along the back edge or down a desk leg to reach outlets cleanly.
- Keep paths out of walkways and away from chair wheels to prevent snags.
- Use good lighting so you can see ports and plug in without fumbling.
Consider a primary station plus a small secondary pad if your desk has multiple functional areas. This keeps power where you use it most and reduces cable clutter across the workspace.
Select the Right Charging Hub or Charging Station for Modern Devices
Choose a station that matches the devices you actually use instead of buying the biggest unit you can find. Focus on the mix of ports and power outputs so the setup fits your routines and your desk area.
Pick the right port mix: include USB-A for older accessories and multiple USB-C ports for phones, tablets, and laptops. Prioritize USB-C with higher-wattage outputs if you want fewer separate chargers on your desk.
When wireless makes sense: wireless pads are great if you want quick drop-and-charge behavior for your phone and less cable handling during the day. Keep one on the surface for convenience, not as the only option.
- Form factors: vertical towers, flat docks, under-monitor units, or compact stations—choose based on available space.
- Simultaneous use: pick a station that maintains speed with several devices connected.
- Safety: buy reputable, UL-listed chargers and power gear for a dependable long-term solution.
Build a Cable Management System That Prevents Tangles
A tidy desk starts with a simple plan for routing each power cord so cables stop drifting across your workspace. Define one clear path per cable and anchor it. That way cords stay out of your work area and you reduce snags.
Anchor routes with clips and straps
Use adhesive or screw-in clips, Velcro straps, or ties to fix cables along the desk underside or back edge. Secure anchors keep cables predictable and protect ports from tension.
Match lengths and label ends
Choose cable lengths that cut slack without pulling on devices. Too much loop causes tangles; too short strains connectors.
Label both ends of each cable with small tags or wrap labels. Clear labels speed swaps and remove mystery chargers when you need a quick change.
Group, hide, and maintain
Group similar devices—phone area, tablet area, laptop area—so your charging station feels logical. For a minimal look, tuck the station into a ventilated bin or basket and route a single clean exit.
- One route per cable keeps order.
- Check cords regularly for fray or tight bends.
- Replace worn cables and keep spare chargers handy.
Set Up Safe, Reliable Power With Outlets and Surge Protection
A safe desk setup starts with how you route mains and protect every outlet you use. Put a quality surge protector or power strip near your charging station so multiple devices get reliable power without messy runs across the desk.
Position a protector for neat routing
Mount the protector under the desk or tuck it behind a monitor stand. This supports tidy cable runs and keeps cords off the surface.
Consolidate chargers into one solution
Use a single station or compact hub to avoid outlet congestion. Grouping chargers keeps the outlet area simple and makes maintenance easier.
Keep the area well-lit and stable
Good lighting helps you plug in without yanking cables. A stable station or tray prevents devices from sliding and reduces accidental disconnects.
- Avoid overloading strips and never daisy-chain power strips.
- Keep ventilation clear and replace worn chargers or cables.
- Route to the nearest outlet without creating trip hazards or chair snags.
- Keep liquids away and leave a small buffer so devices aren’t perched on edges.
Test Your Charging Experience and Optimize the Setup Over Time
Run a quick hands-on check so every cable, port, and station works as you expect.
Step 1: Plug each device into every port and confirm steady power. Look for loose fits, slow speed, or intermittent connections.
Step 2: Observe real-world experience over a few days. Note which station and cables you reach for most and which go unused.
Collect simple data to guide changes
Keep a short note or spreadsheet with daily information: what you plug in, peak times, and any bottlenecks. This data shows real patterns faster than guesses.
Adjust based on what you learn
If you pull a cable across the desk often, move the station, swap a cable length, or add a higher-wattage port. Small moves save time and reduce clutter.
- Run a full-device test and log results.
- Track use for several days to gather useful data.
- Do light maintenance: visual checks, cable replacement, and firmware updates if available.
Conclusion
Finish with one small change you can make now to cut clutter and save time. Pick a single step and act so the improvement feels manageable.
The core takeaway is simple: the right spot plus tidy cable routing makes charging routine, not a distraction. Use this guide in order—assess needs, choose a visible area, select the right ports and options, route cables cleanly, and protect power safely. A small wireless add-on can reduce cord handling and keep the desktop neater.
Revisit these ideas as your device mix shifts. Today, make one focused change—move a charger, label cables, or mount a power strip—and build from that single win.